Unlocking Image Creation with Flux and GPT-4o

This week I decided to see how many buzzwords I could get into one post, given the recent release of Flux by Black Forest Labs I had originally intended on trying to get it up and running locally - however it quickly became clear that my M3 MacBook Pro with its 36GB of RAM wasn’t going to cut it. Because of this, I decided to look at one of the many online services that offer access to the various Flux models via their APIs which led me to Fal.AI which in turn gave me the idea for this post.
The Tools
Before we dive into the idea I had, let’s quickly get ourselves up to speed with the tools we’ll be using in this post. Each of these technologies plays a crucial role in our AI-powered image generation project.
Flux.1: The new kid on the block
A team of AI researchers and engineers, renowned for their work on foundational generative AI models like VQGAN and Latent Diffusion across academic, industrial, and open-source platforms, surprised everyone with the announcement of Black Forest Labs.
Alongside their Series Seed funding round of $31 million, they also revealed the immediate availability of three variations of their Flux.1 model:
- FLUX.1 [pro]: The premier version of the FLUX.1 model, offering state-of-the-art image generation with exceptional prompt following, visual quality, image detail, and output diversity. FLUX.1 [pro] is accessible via API, and is also available through platforms such as Replicate and fal.ai. Additionally, it supports dedicated and customized enterprise solutions.
- FLUX.1 [dev]: An open-weight, guidance-distilled model intended for non-commercial applications. Derived directly from FLUX.1 [pro], FLUX.1 [dev] provides similar quality and prompt adherence capabilities while being more efficient than standard models of the same size. The model’s weights are available top download from Hugging Face, and it can be executed on Replicate and fal.ai.
- FLUX.1 [schnell]: Designed as the fastest model in the lineup, FLUX.1 [schnell] is optimized for local development and personal use. It is freely available under an Apache 2.0 license, with weights hosted on Hugging Face. Inference code can be found on GitHub and in Hugging Face’s Diffusers, and the model is integrated with ComfyUI from day one.
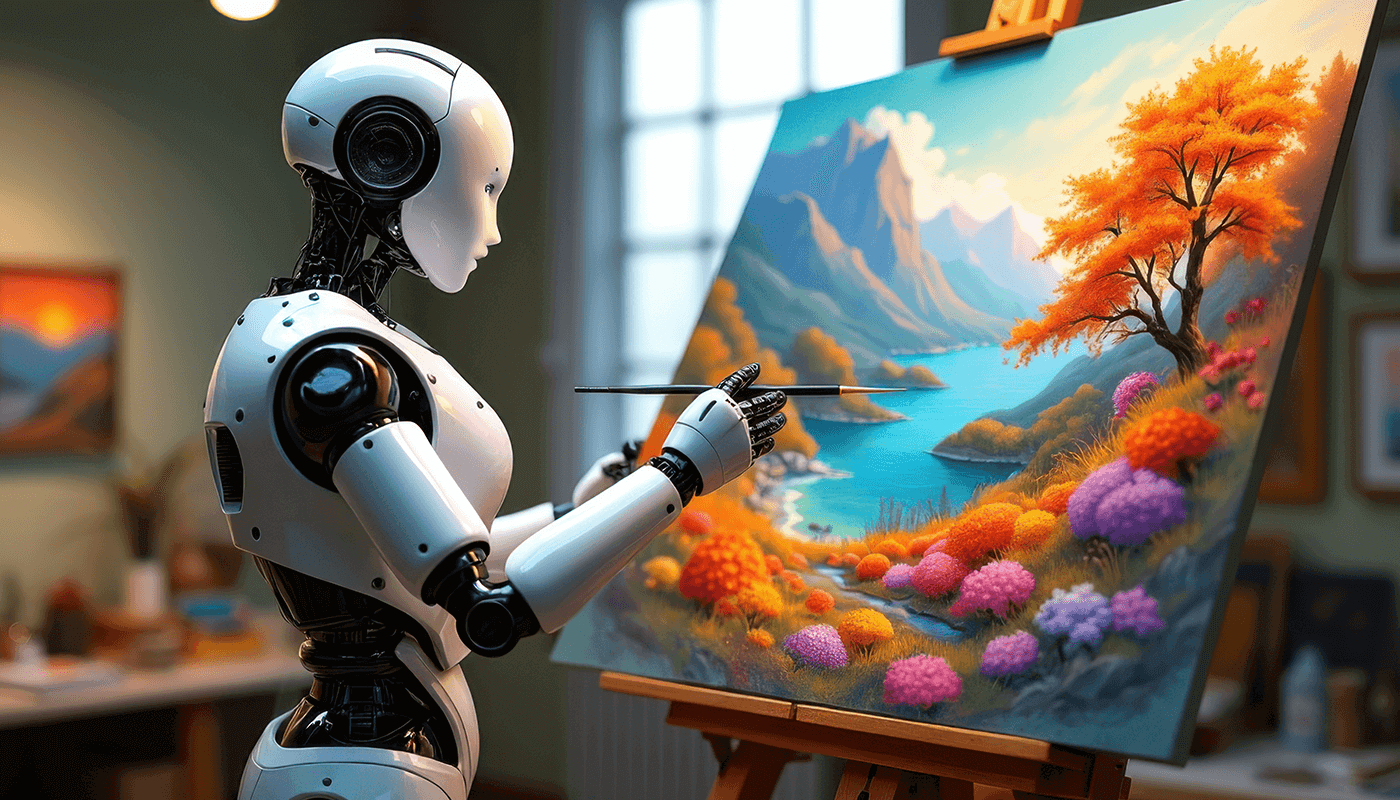
For an idea of what you can produce have a look at the example images below, which were all generated using the tools we are going to be covering in this post:
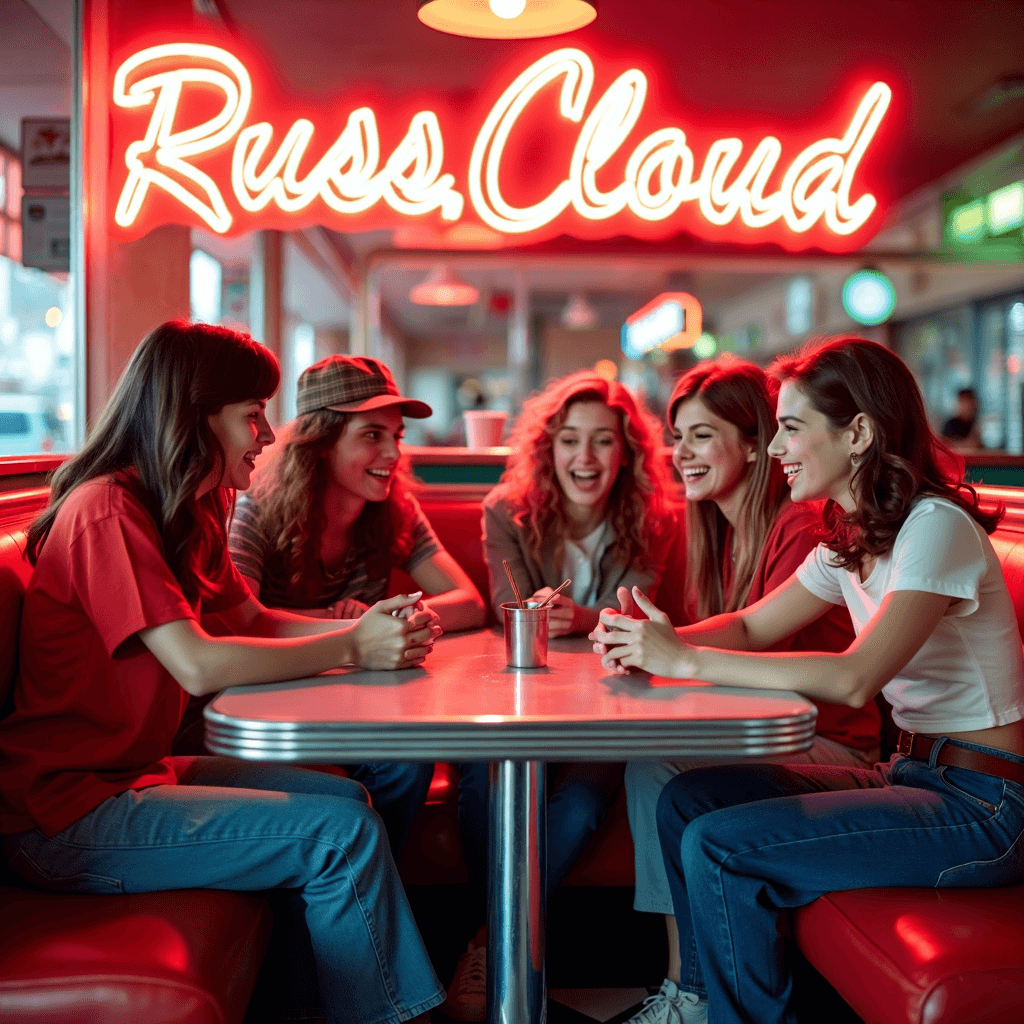
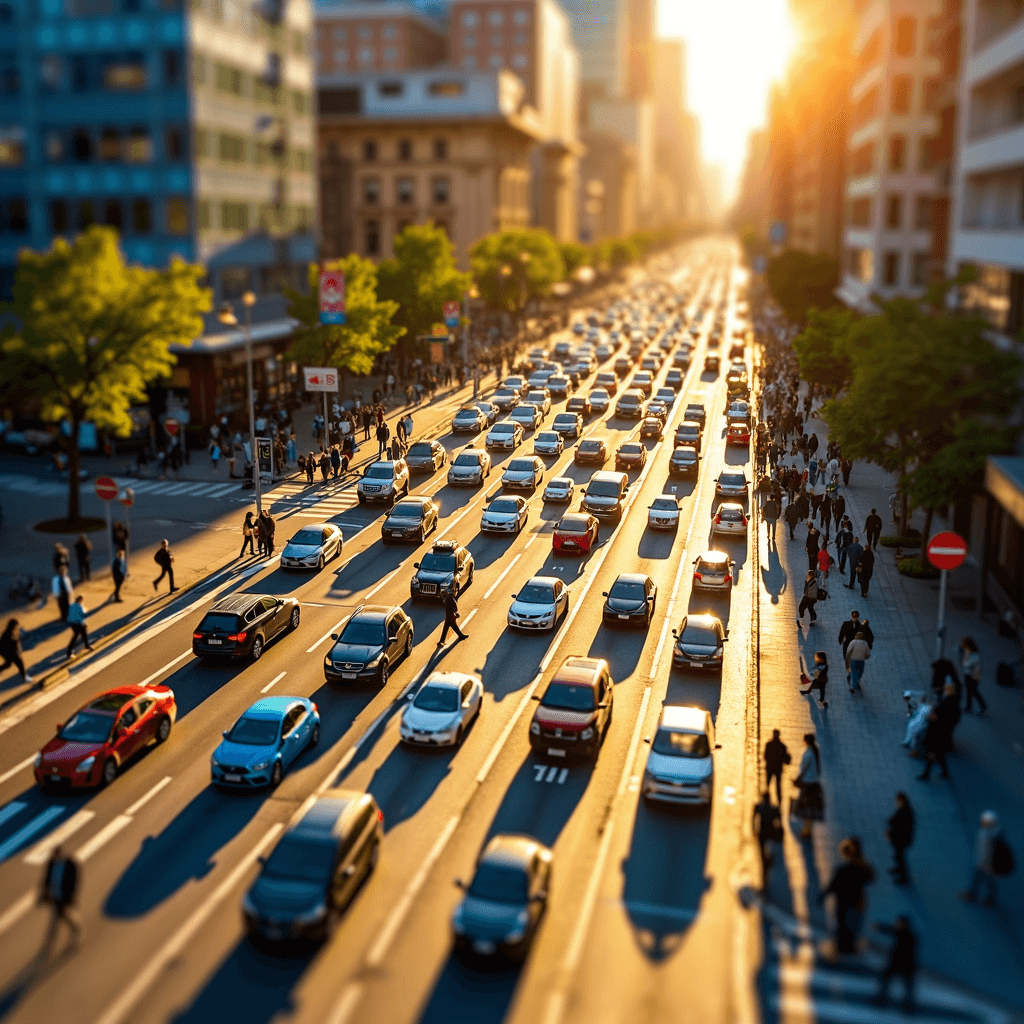


As you can see, it can not only handle text extremely well, but it also produces high-quality photo-realistic images as well as some abstract ones.
fal.ai: Doing the heavy lifting
Also already mentioned, running even the small model locally was out of the question so I decided to look at one of the two original partners providing all three models in the Flux.1 family, I chose to focus on fal.ai as I had used them previously to test another model earlier in the year.
export FAL_KEY="YOUR_API_KEY"curl --request POST \ --url https://fal.run/fal-ai/flux-pro \ --header "Authorization: Key $FAL_KEY" \ --header "Content-Type: application/json" \ --data '{ "prompt": "Extreme close-up of a single tiger eye, direct frontal view. Detailed iris and pupil. Sharp focus on eye texture and color. Natural lighting to capture authentic eye shine and depth. The word \"FLUX\" is painted over it in big, white brush strokes with visible texture." }'This returned the following JSON response:
{ "images": [ { "url": "https://fal.media/files/panda/oGSuf_FrMn7im_0DGnSdg_4378270c342f4170bb0f55e14cbb0636.jpg", "width": 1024, "height": 768, "content_type": "image/jpeg" } ], "timings": {}, "seed": 932194184, "has_nsfw_concepts": [ false ], "prompt": "Extreme close-up of a single tiger eye, direct frontal view. Detailed iris and pupil. Sharp focus on eye texture and color. Natural lighting to capture authentic eye shine and depth. The word \"FLUX\" is painted over it in big, white brush strokes with visible texture."}Opening the image in the response gave us the following:
This got me thinking - there is a Python library for fal.ai so I could use that, also what other tools have Python libraries I can use alongside fai.ai?
OpenAI: Building a Better Prompt
OpenAI shouldn’t need an introduction, we will be using the GPT4o models to help with prompting.
Streamlit: Bring it all together
Streamlit is a Python framework from Snowflake that quickly lets you build data and AI-driven web applications with a really low entry point, see the following for a quick overview:
There was just one problem with this, I am not a developer - so how could I do this?
Claude: Your personal development team
The final tool used in this post is Claude from Anthropic, while I may not be a developer - I can prompt and debug code and since the release of Claude 3.5 Sonnet I have been using it more and more for development tasks.
So let’s give it a go !!!
The Idea
The idea I had was to use Streamlit to build an interface to interact with the fal.ai API and the Flux family of models from my local machine - as part of this it should also use GPT4o to help tune the prompt to give us the best shot at getting a good result from Flux.
Running the application
Before we dive into the code, let’s just download and run the app.
Getting the keys
To run the application you will need two API keys, one for fal.ai and the other for the OpenAI API, the links below:
Make a note of the keys and keep them very safe.
Creating the environment
Next up we need to create an environment to run the application in and grab the code from GitHub.
Run the commands below to create the conda environment, switch to it, check the code out from GitHub and install the required Python packages:
conda create -n streamlit python=3.12conda activate streamlitgit clone https://github.com/russmckendrick/flux-fal-openai-streamlit.gitcd flux-fal-openai-streamlitpip install -r requirements.txtLaunching the application
We are nearly ready to launch the application, just one more thing to do and that is the expose our API keys as an environment variable for our application to read:
export FAL_KEY="<put-your-fal.ai-key-here>"export OPENAI_API_KEY='<put-your-openai-key-here>'With the keys in place we can launch the application by running the command below:
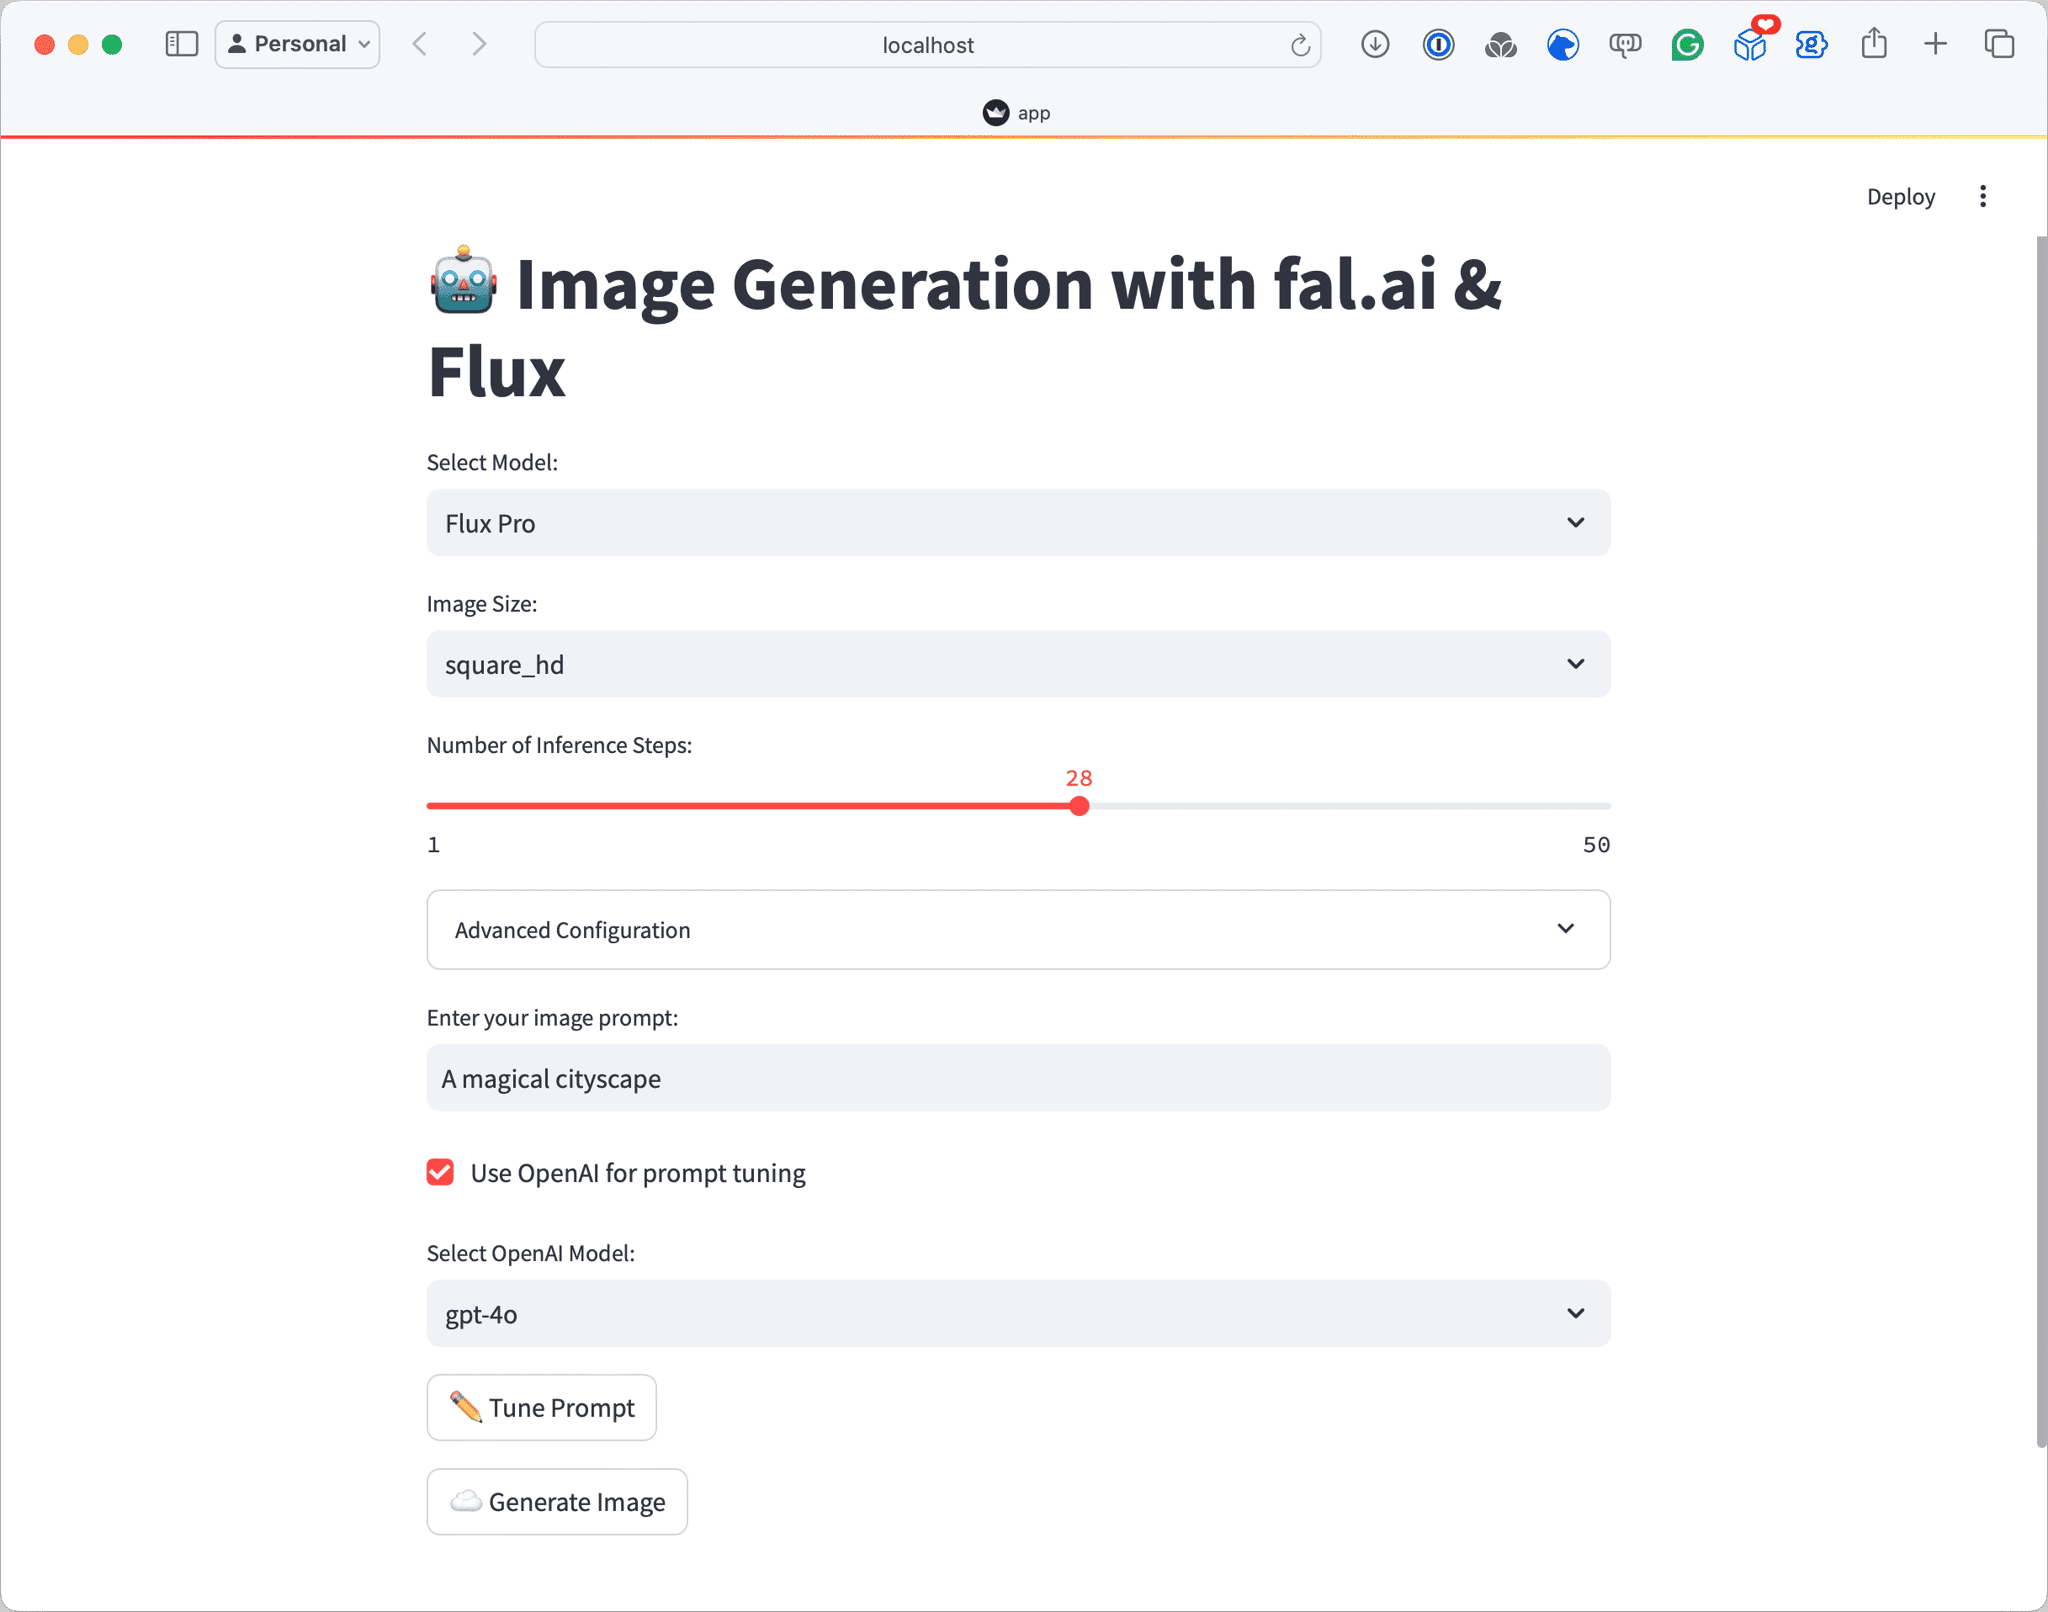
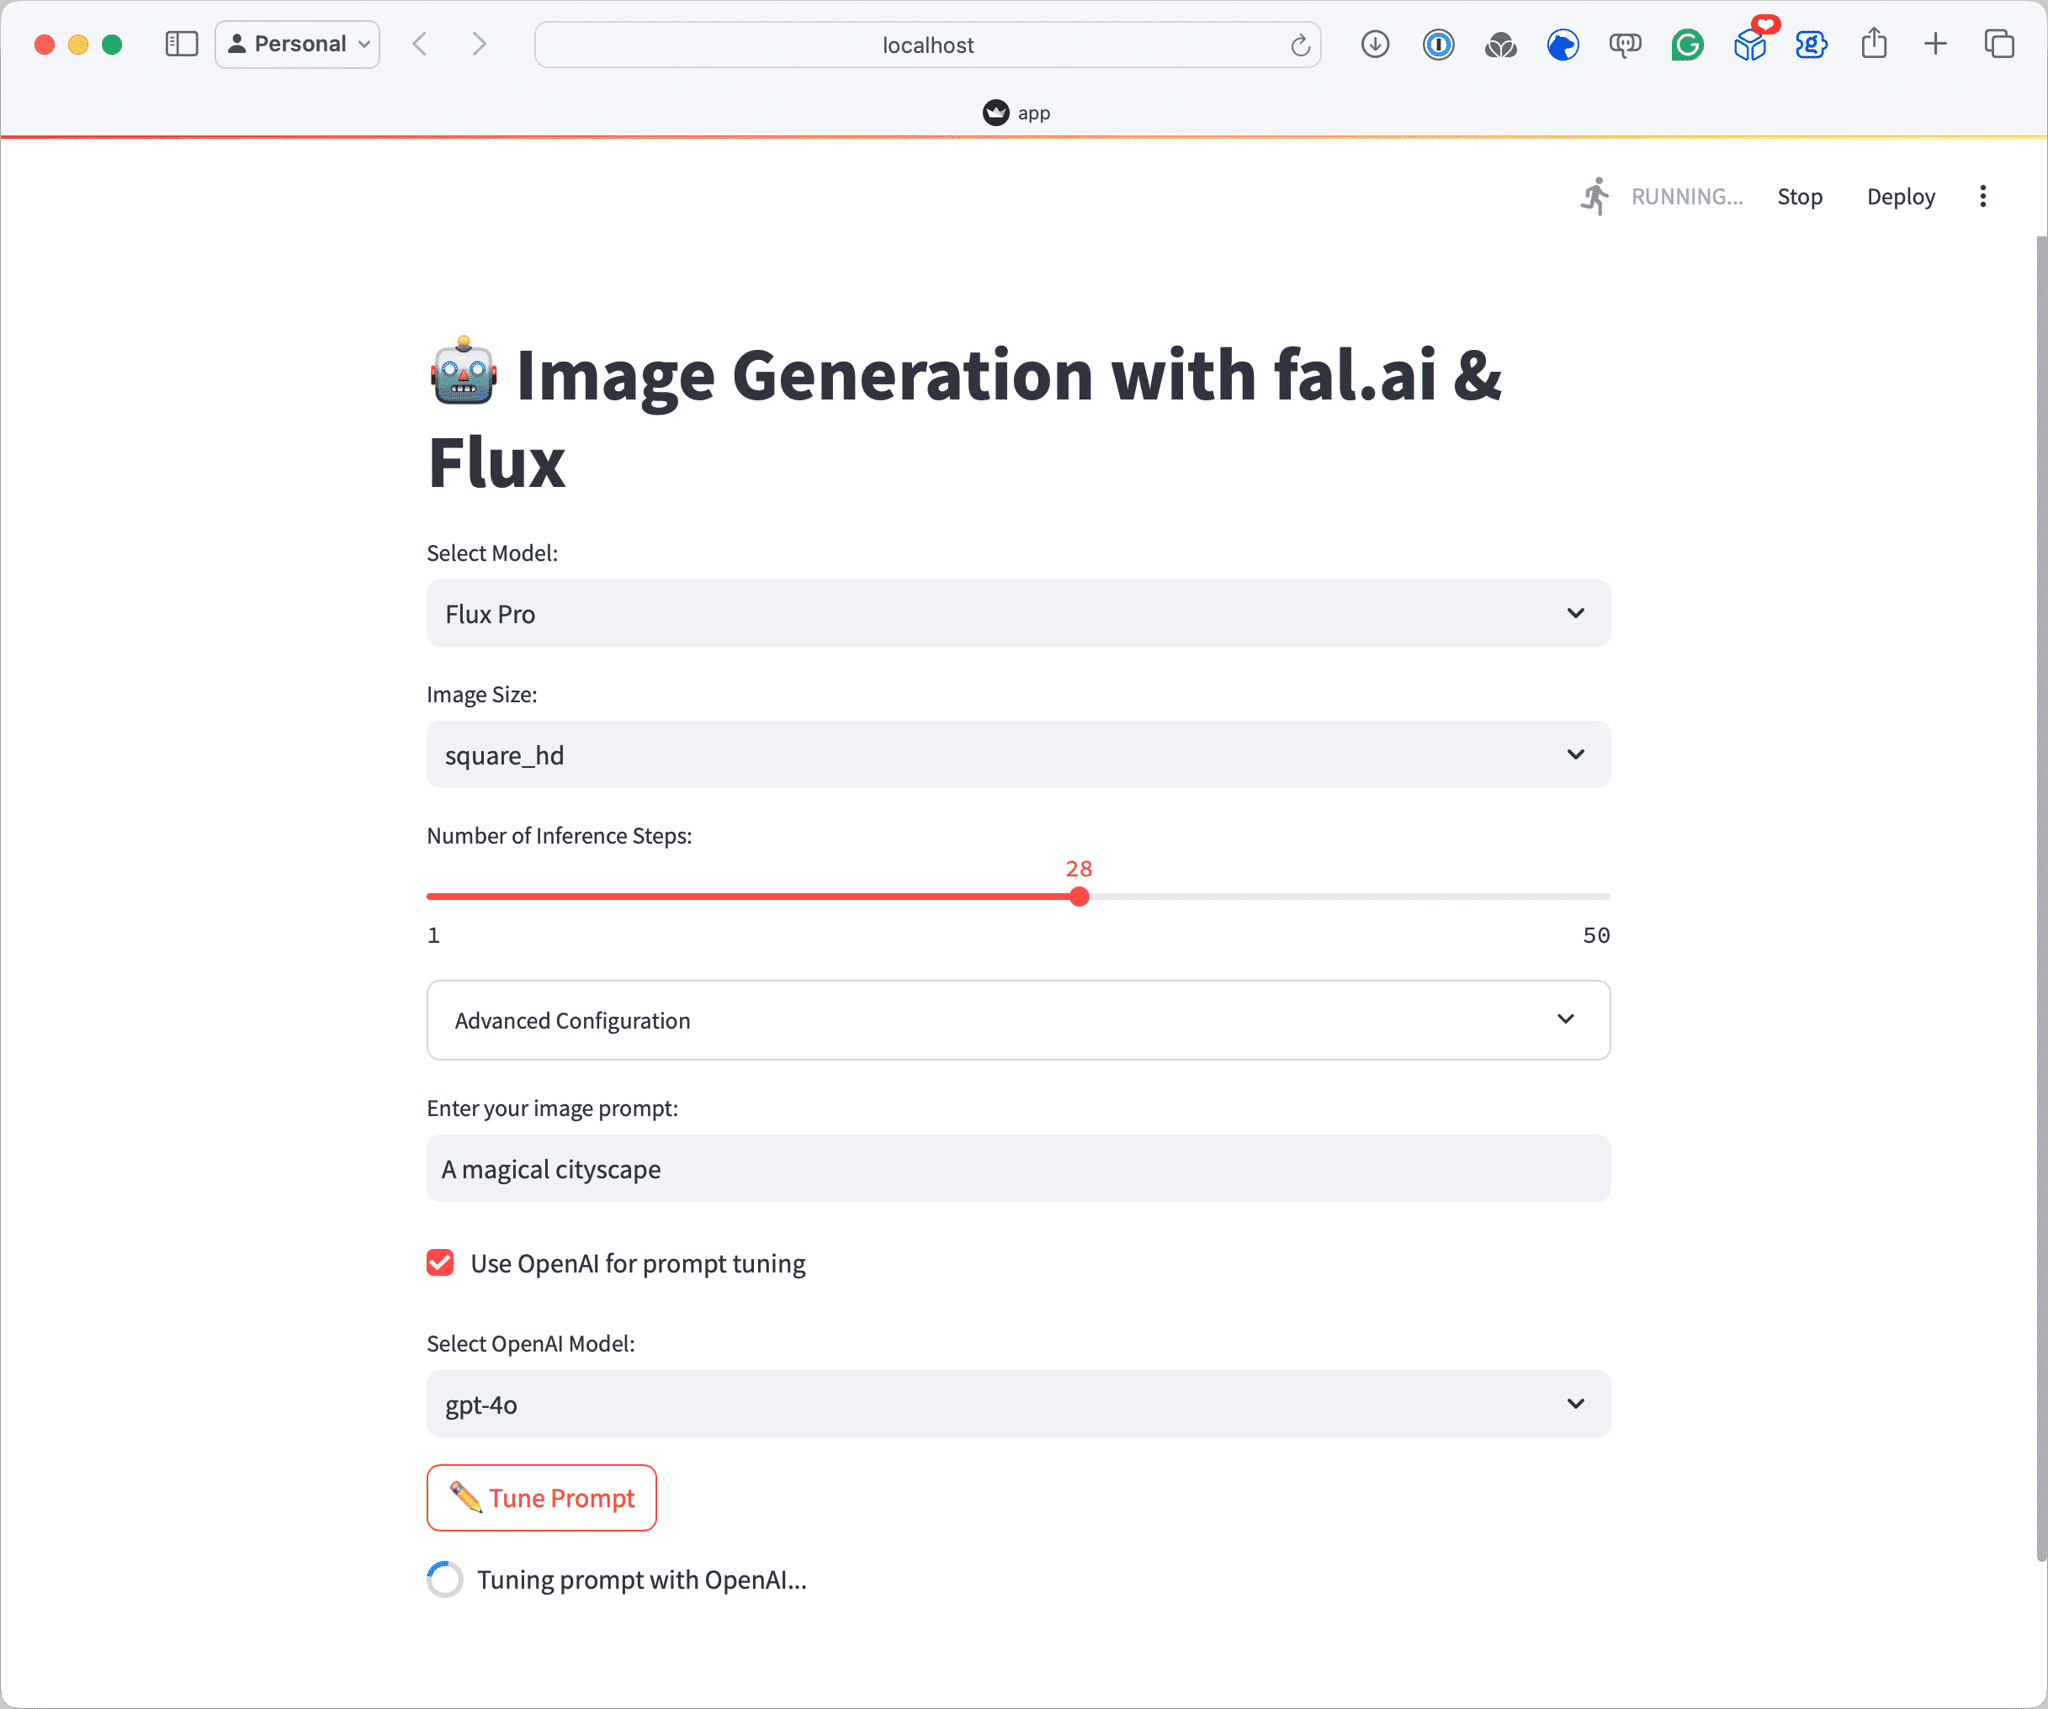
streamlit run app.pyThis will open the application window, which should look something like the following:
Using the application
Now we have the application open, let’s generate an image, first let’s write a basic prompt:
Just clicking “☁️ Generate image” at this point will give you an impressive-looking image without any tuning, below is the image which was generated using the basic prompt above:
Lets now get GPT-4o to expand on our basic prompt. First, click on “Use OpenAI for prompt tuning” and then select your chosen GPT-4o model from the drop-down, in this example, I will use the default of gpt-4o rather than gpt-4o-mini, then click on the “✏️ Tune Prompt” button.
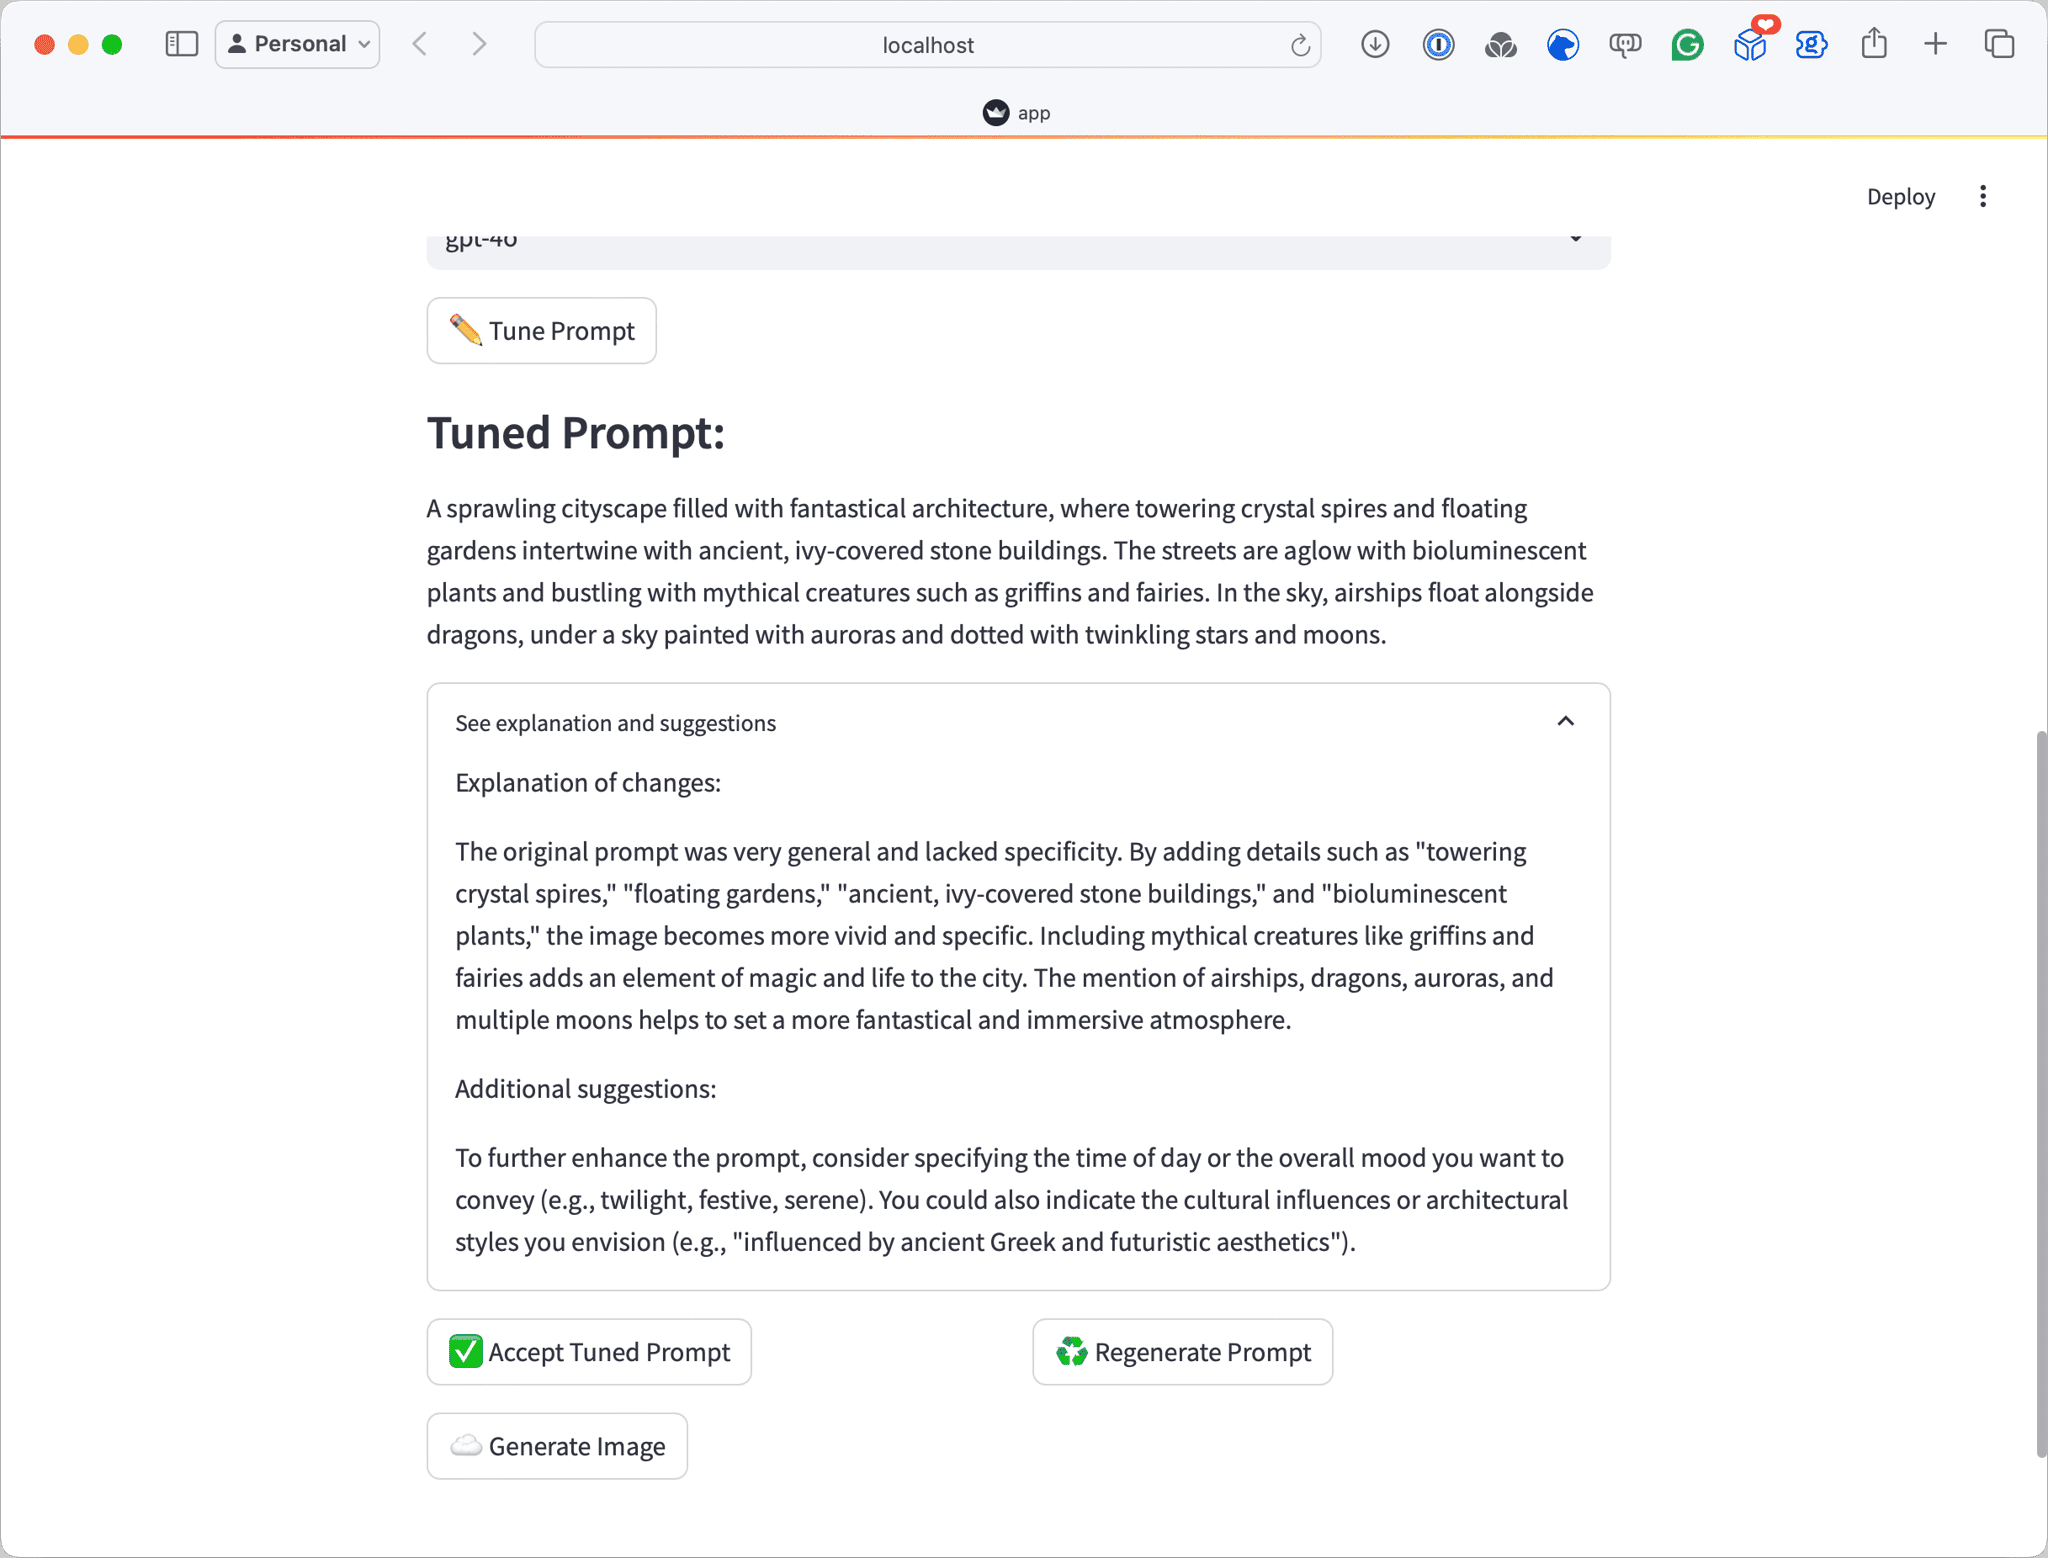
This will send your original prompt to the model and not only return a new prompt, which in this run was:
You will also get if you click on “See explanation and suggestions” more details on why the prompt has been updated:
As well as more suggestions on how you could further improve the prompt:
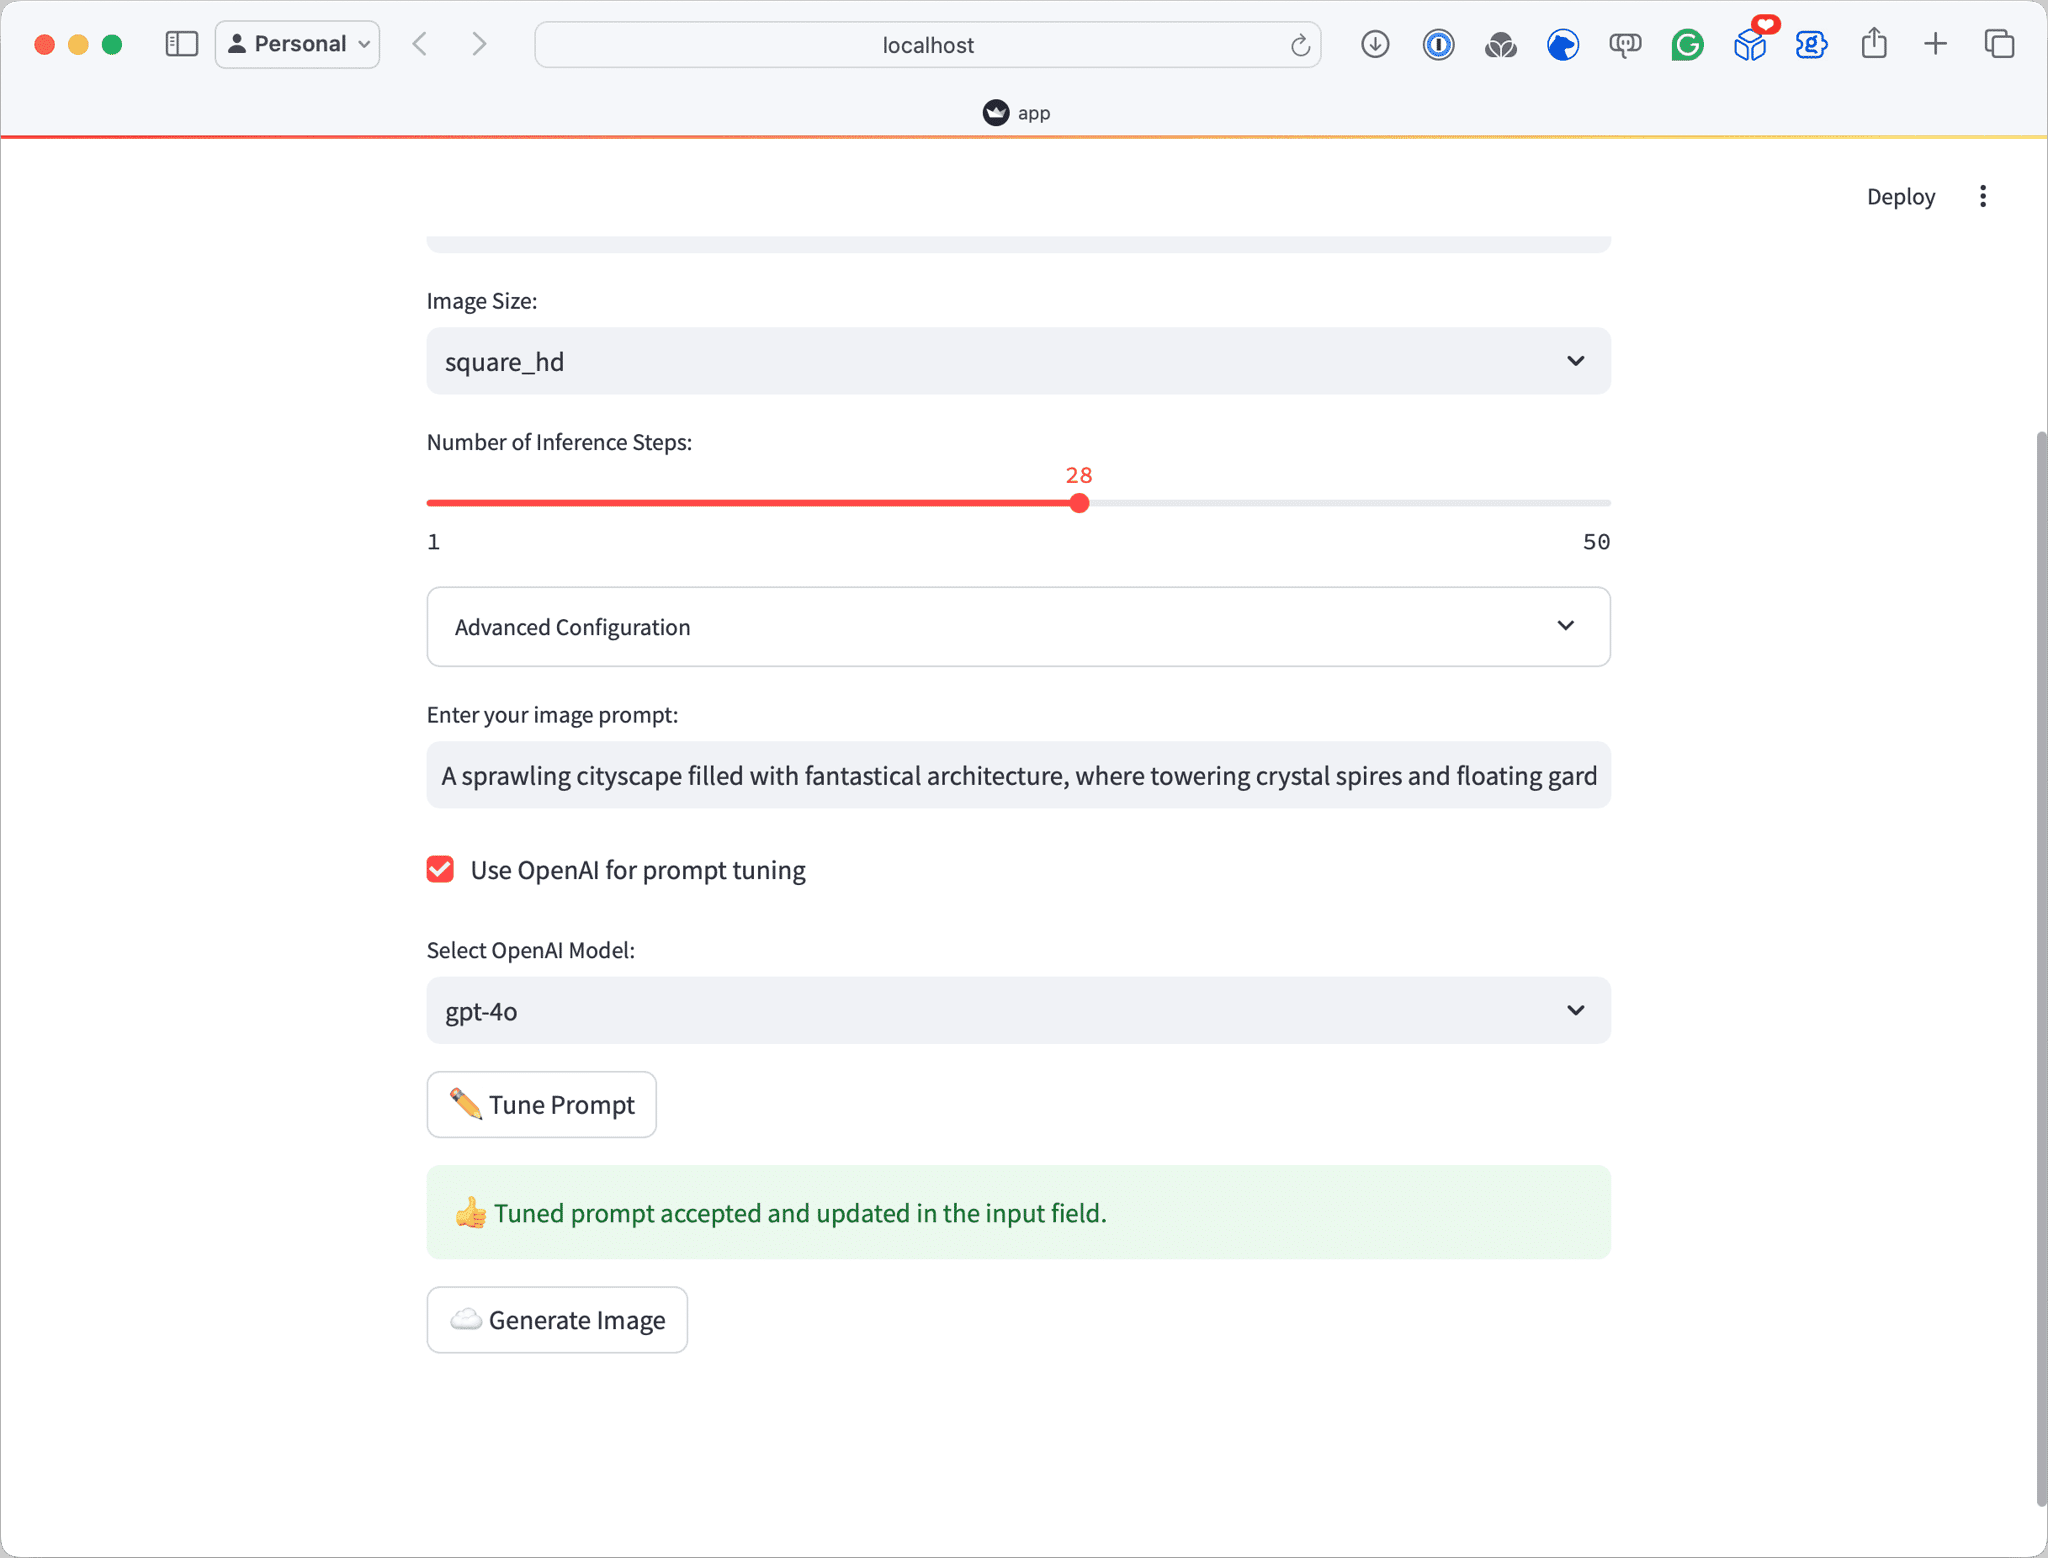
If you are happy with the new prompt, click on ”✅ Accept Tuned Prompt” and then click the “☁️ Generate image” button, after a minute you will get your image back:
The screens below show how the process above looks within the application:
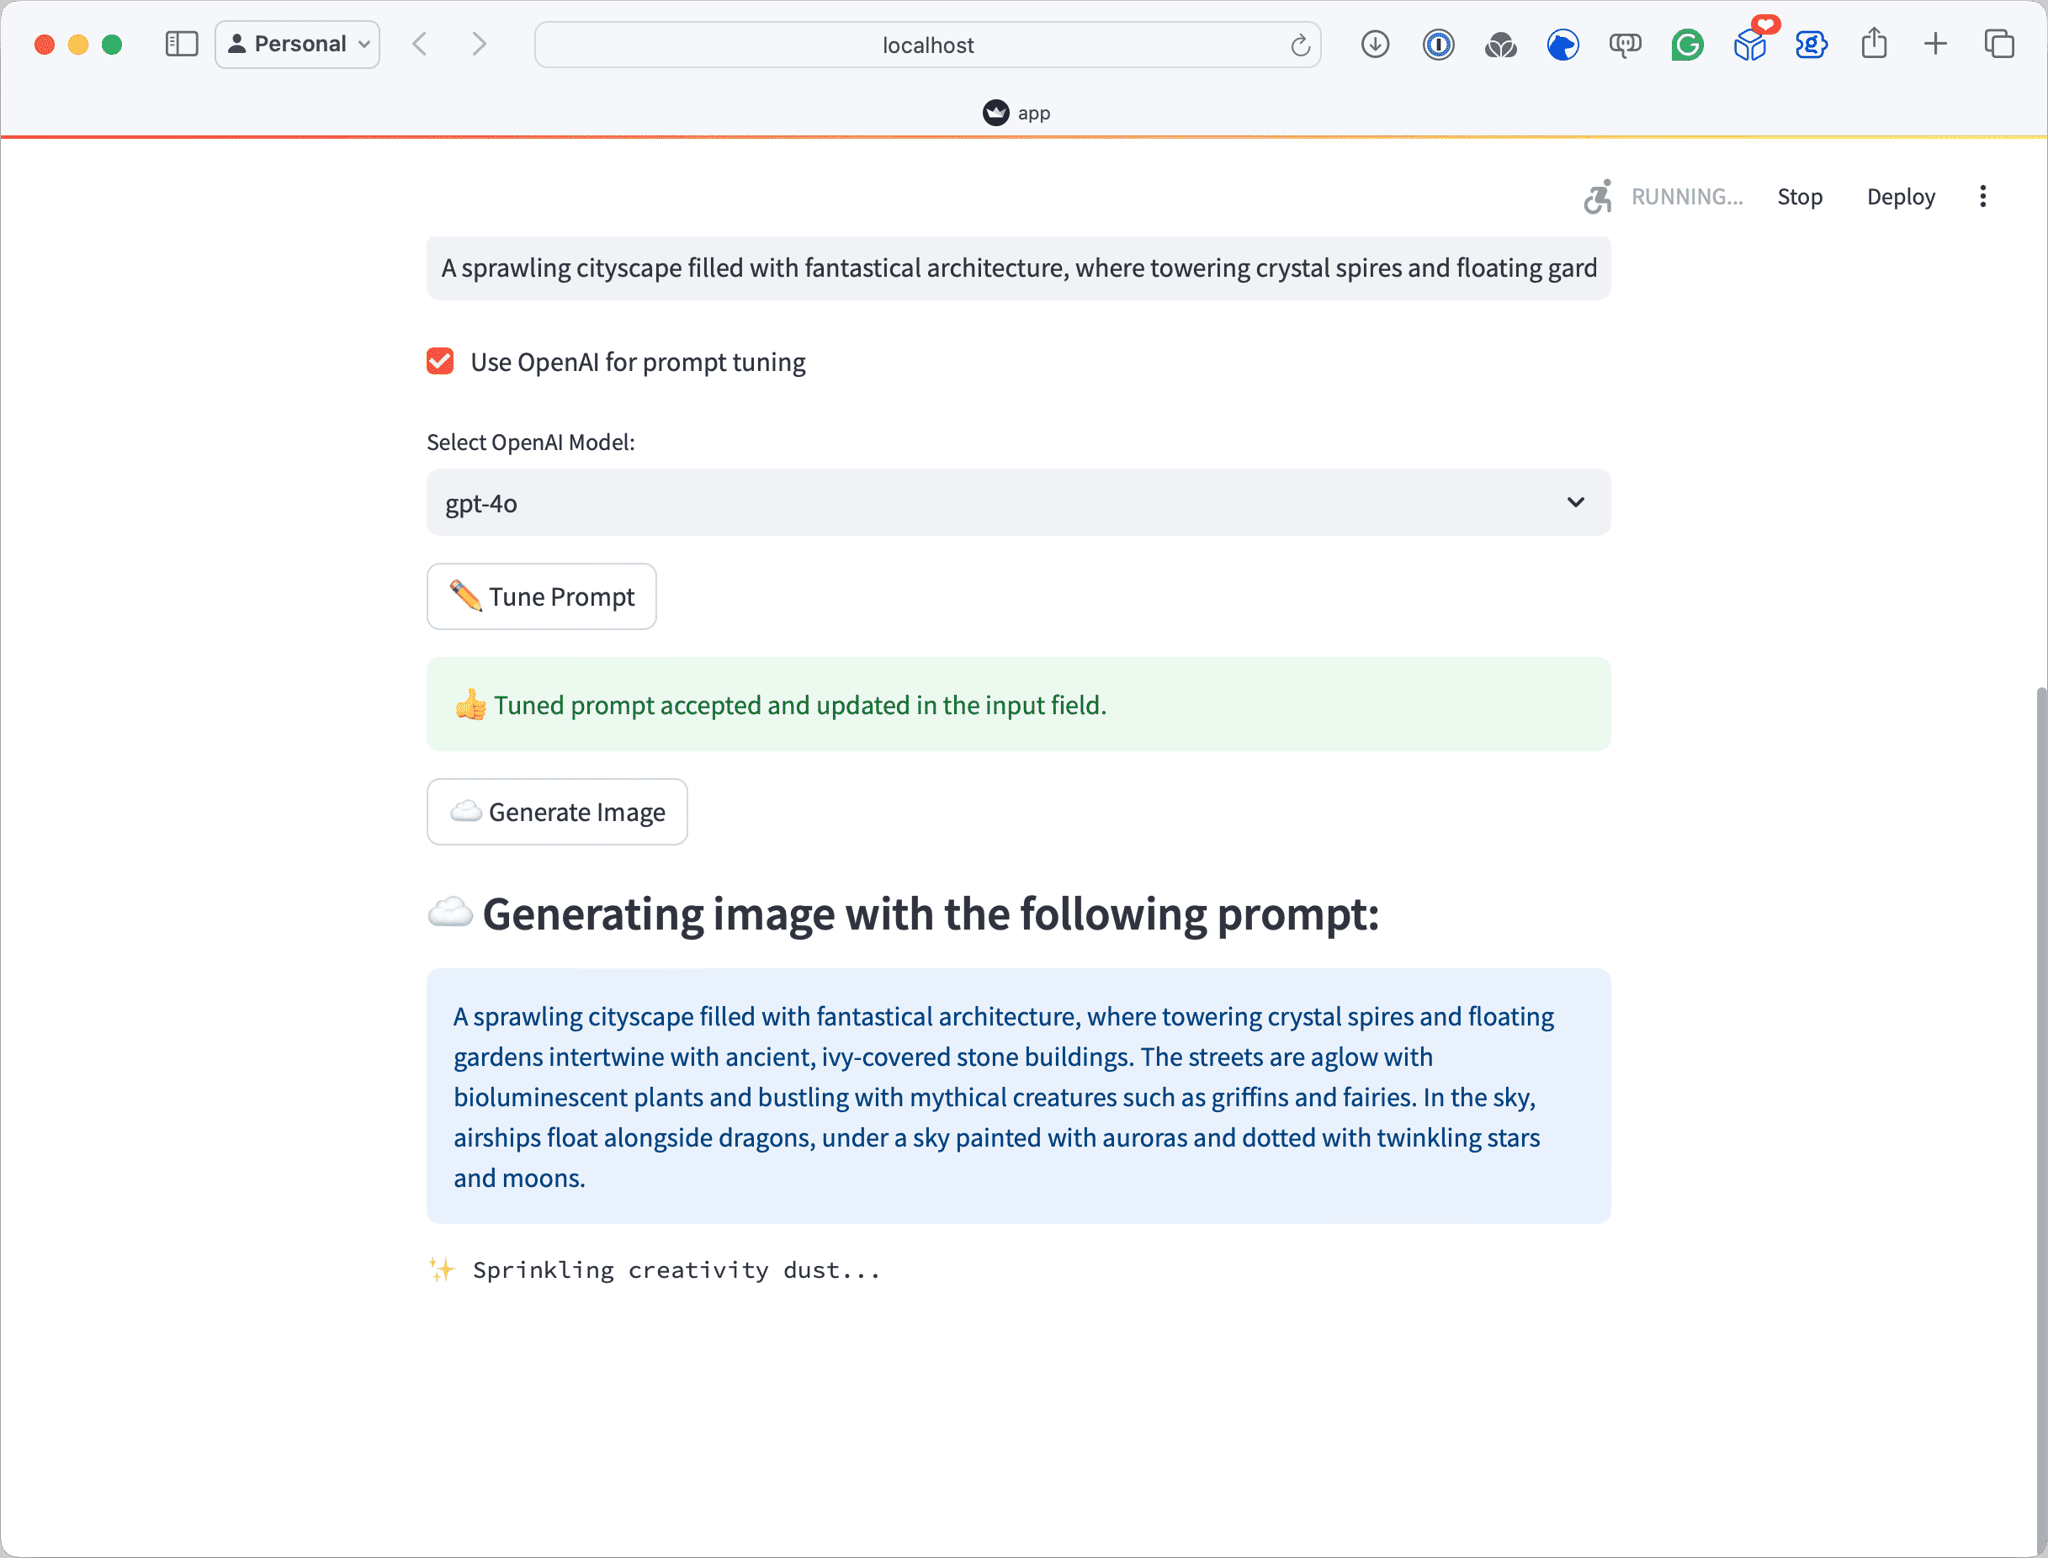
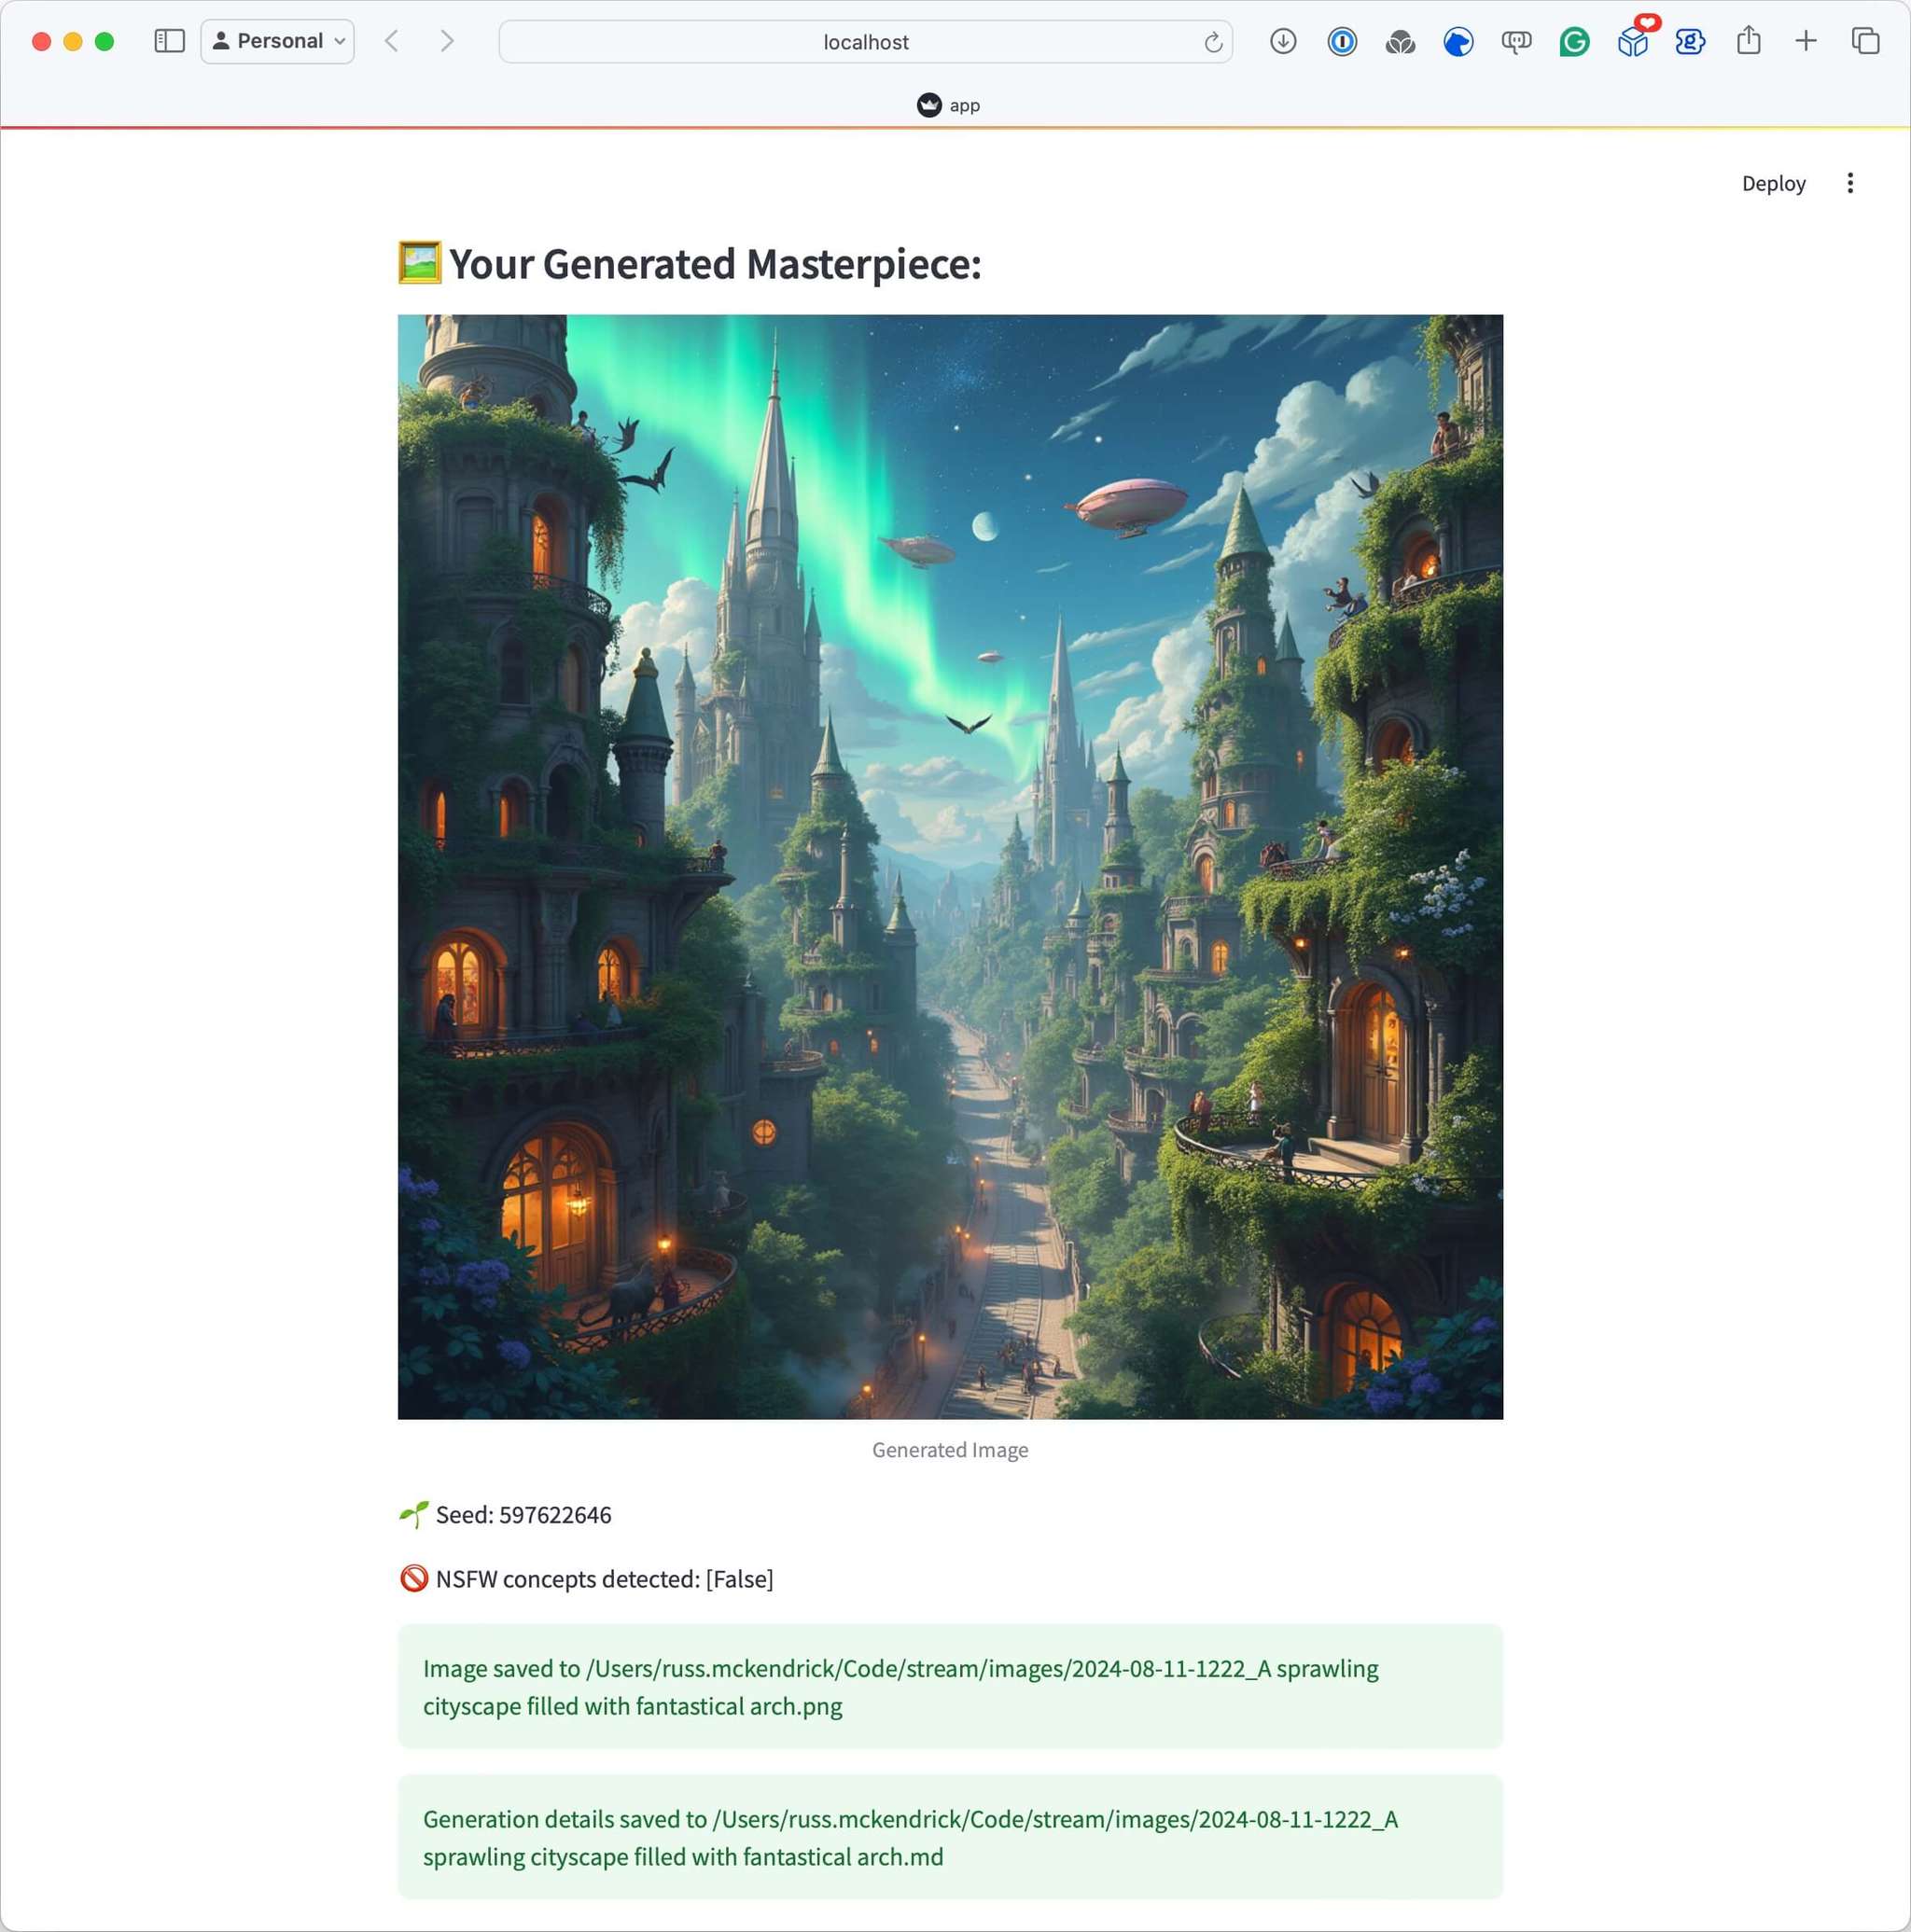
As you can see from the last picture, a copy of the image and a markdown summary have been saved to your local machine.
Code Highlights
Let’s take a closer look at some key parts of our application’s code. These snippets highlight the core functionality and demonstrate how we’re integrating the various tools we’ve discussed. By examining these, you’ll get a better understanding of how the different components work together to create our AI-powered image generation app.
def tune_prompt_with_openai(prompt, model):    openai_api_key = os.getenv("OPENAI_API_KEY")    if not openai_api_key:        raise ValueError("OPENAI_API_KEY environment variable is not set")
    client = openai.OpenAI(api_key=openai_api_key)    response = client.chat.completions.create(        model=model,        messages=[            {                "role": "system",                "content": "You are an advanced AI assistant specialized in refining and enhancing image generation prompts. Your goal is to help users create more effective, detailed, and creative prompts for high-quality images. Respond with: 1) An improved prompt (prefix with 'PROMPT:'), 2) Explanation of changes (prefix with 'EXPLANATION:'), and 3) Additional suggestions (prefix with 'SUGGESTIONS:'). Each section should be on a new line."            },            {                "role": "user",                "content": f"Improve this image generation prompt: {prompt}"            }        ]    )    return response.choices[0].message.content.strip()
As you can see from the system prompt below, we are instructing the model to not only generate the prompt but also everything else and how it should format its response:
This means we only make one call to the model and also we have sections we can identify when we receive the response.
As the images may take a little while to generate I had Claude add some messages to cycle through rather than us just looking at a boring spinner:
def cycle_spinner_messages(): messages = [ "🎨 Mixing colors...", "✨ Sprinkling creativity dust...", "🖌️ Applying artistic strokes...", "🌈 Infusing with vibrant hues...", "🔍 Focusing on details...", "🖼️ Framing the masterpiece...", "🌟 Adding that special touch...", "🎭 Bringing characters to life...", "🏙️ Building the scene...", "🌅 Setting the perfect mood...", ] return itertools.cycle(messages)When I said Streamlit made creating web applications really easy, I wasn’t kidding. The code below generates the bulk of what you see on the initial screen:
def main():    st.title("🤖 Image Generation with fal.ai & Flux")
    # Check for environment variables    if not os.getenv("FAL_KEY"):        st.error("FAL_KEY environment variable is not set. Please set it before running the app.")        return
    # Model selection dropdown    model_options = {        "Flux Pro": "fal-ai/flux-pro",        "Flux Dev": "fal-ai/flux/dev",        "Flux Schnell": "fal-ai/flux/schnell",        "Flux Realism": "fal-ai/flux-realism"    }    selected_model = st.selectbox("Select Model:", list(model_options.keys()), index=0)
    # Basic parameters    image_size = st.selectbox("Image Size:", ["square_hd", "square", "portrait_4_3", "portrait_16_9", "landscape_4_3", "landscape_16_9"], index=0)    num_inference_steps = st.slider("Number of Inference Steps:", min_value=1, max_value=50, value=28)
    # Advanced configuration in an expander    with st.expander("Advanced Configuration", expanded=False):        guidance_scale = st.slider("Guidance Scale:", min_value=1.0, max_value=20.0, value=3.5, step=0.1)        safety_tolerance = st.selectbox("Safety Tolerance:", ["1", "2", "3", "4"], index=1)
    # Initialize session state    if 'user_prompt' not in st.session_state:        st.session_state.user_prompt = ""    if 'tuned_prompt' not in st.session_state:        st.session_state.tuned_prompt = ""    if 'prompt_accepted' not in st.session_state:        st.session_state.prompt_accepted = False
    # User input for the prompt    user_prompt = st.text_input("Enter your image prompt:", value=st.session_state.user_prompt)
    # Update session state when user types in the input field    if user_prompt != st.session_state.user_prompt:        st.session_state.user_prompt = user_prompt        st.session_state.prompt_accepted = False
    # OpenAI prompt tuning options    use_openai_tuning = st.checkbox("Use OpenAI for prompt tuning", value=False)
    openai_model_options = ["gpt-4o", "gpt-4o-mini"]    selected_openai_model = st.selectbox("Select OpenAI Model:", openai_model_options, index=0, disabled=not use_openai_tuning)
The drop-downs, text input boxes, sliders and the hidden advanced settings are all native Streamlit components which “just work”, also being all native it gives the application a nice consistent look when other things happen like:
# Display the prompt being used st.subheader("☁️ Generating image with the following prompt:") st.info(user_prompt)The rest of the code can be found on the application’s GitHub repo.
Some more images
Before wrapping up this post, let’s take some of the prompts I have used to generate previous blog post covers in Midjouney and run them through Flux - I will leave you to make your own mind up on which is better 😊.
Generating an Azure Storage Account SAS token using Azure Logic and Function apps
Midjourney …
Flux.1 [pro] …
Azure Firewall KQL Query
Midjourney …
Flux.1 [pro] …
Azure Virtual Desktop KQL Queries
Midjourney …
Flux.1 [pro] …
Azure DevOps Ansible Pipeline; Boosting Efficiency with Caching
Midjourney …
Flux.1 [pro] …
Day to Day Tools, the 2024 edition
Midjourney …
Flux.1 [pro] …
Conda for Python environment management on macOS
Midjourney …
Flux.1 [pro] …
Conclusion
Now that you’ve seen the potential of combining Flux, fal.ai, OpenAI, and Streamlit, why not give it a try yourself? Clone the repository, set up your environment, and start experimenting with your own prompts. Whether you’re a developer looking to build on this framework or a creative professional curious about AI-assisted image generation, there’s plenty of room for exploration and innovation. Don’t forget to share your experiences or any cool images you generate – I’d love to see what you come up with!
Related Posts
codebase-memory-mcp: Giving Claude Code (and Codex) a Map
A short look at codebase-memory-mcp, an MCP server that indexes your codebase into a queryable knowledge graph so Claude Code or Codex can answer structural questions without grepping every file.

Counting the Cost of Vibe Coding
A local-first dashboard for tracking AI coding tool spend across Claude Code, Codex, Cursor, Copilot, and Gemini CLI - with a TUI, a desktop app, and zero API keys required.

Introducing AI Commit
A Rust CLI I built to stop writing terrible commit messages - aic generates AI-powered commit messages, PR drafts, diff reviews, and repo visualisations from your staged changes.

Comments