Over the next few weeks, I am planning on doing some work which requires me to spin up and teardown several small Kubernetes clusters.
As I have access to an Azure Subscription and Microsoft have made the process of launching a cluster quite a painless experience I thought it would make sense to write a quick blog post to cover launching, configuring and tearing down an Azure AKS Cluster.
To start with I prefer to set a few environment variables on the command-line for things such and the resource name which are repeated through of the commands I need to run;
Once that the environment variables have been configured, using the same terminal window, we can create the resource group using the following command;
It should only take a few seconds to create the group. Now that the resource group is present we can then launch the AKS cluster, to do this use the following command;
As you may have guessed this launches and configures a cluster with the number of nodes which we defined in the $AKSNUMNODES environment variable. The process takes several minutes.
Once complete, the next step is to configure our local client to communicate with the newly launched cluster. The first thing you may need to do is install the client itself, luckily Microsoft has made this a simple process, and you can just run the following command;
Once installed you can run kubectl version to get confirmation that the agent is installed, don’t worry if you see an error about connecting to the cluster, we haven’t gotten that far yet.
Now with the client installed we need to grab the credentials needed to connect to our ASK cluster, again, this is quite a simple process, just run;
Once the connection details have been imported running the following command;
Should show that you have two nodes in your cluster;

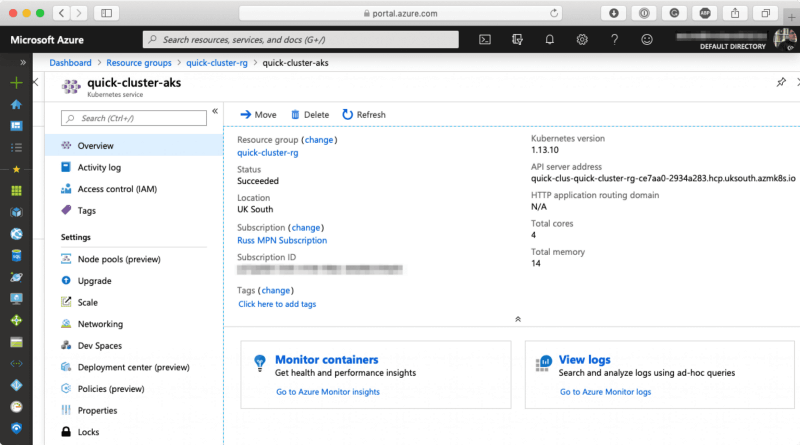
Also, you should be able to see the cluster in the Azure Portal ;

To tear down the cluster, return to the command-line and if needed re-enter just the AKSRG and AKSCLUSTER environment variables;
Now Running the command below will prompt if you want to delete the cluster;
It is possible to add --yes to the command to skip the prompt; however, it is always best to check just in case you end up removing the wrong cluster;

The final Azure resource to remove will the resource group, to do this run;
Now that the Azure resources have been removed that just leaves us with our local configuration to tidy up. You can remove the cluster and context from your local configuration by running;
To check that have been removed you can run;
There you have it, with three commands you quickly spin up an X node Kubernetes cluster within Azure with little effort.

