Portainer, a UI for Docker
Part of my daily routine is to go through Reddit, RSS feeds and also wading through the MediaGlasses twitter account where I follow loads of technical people & companies.
Over the lat week or so I have seen Portainer mentioned quite a lot, particularly since it has now had over 1M + pulls on the Docker Hub;
https://x.com/russmckendrick/status/812717388332351488
I decided to check it out. It describes itself as;
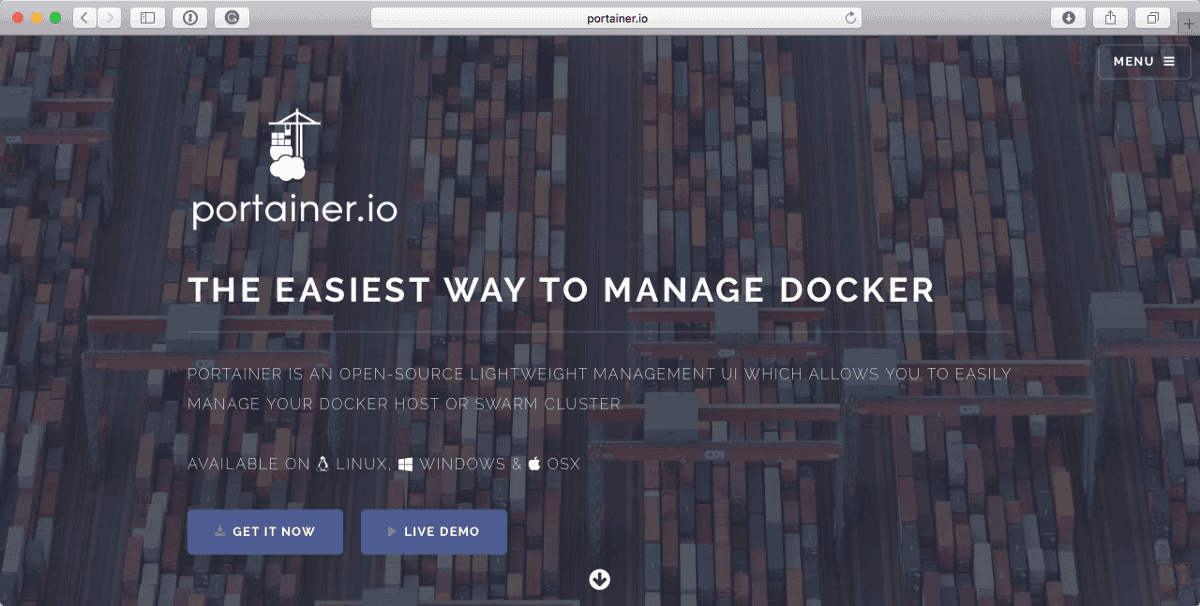
The Easiest Way To Manage Docker. Portainer is an open-source, lightweight management UI which allows you to easily manage your docker host or swarm cluster
I thought I would post a quick update, giving a bit of background on how Portainer came to be (based on comments from Hacker News & Reddit).
Portainer originally started off life as Docker UI by Michael Crosby who handed the code base off to Kevan Ahlquist, at this point, due to trademark concerns, the project is renamed UI For Docker.
Development of UI For Docker continued, but, it began to slow when Docker introduced features such as Swarm mode to the core Docker Engine and also a change of job for Kevan.
At the beginning of December 2016, a notice was committed to the UI For Docker repo stating that it the repo is now deprecated and people should use Portainer.
Portainer was forked from UI For Docker around this time last year, with its first major release in June 2016.
Since that release the authors estimate around 70% of the code has already been rewritten and over the course of the next six months as well adding new features such as role-based controls and Docker Compose support the developers believe that remaining 30% of the original code will have been rewritten.
Now, let’s crack on with installing it.
Local installation
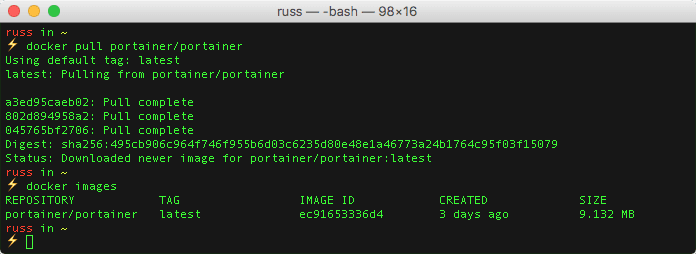
First of all using Docker For Mac lets install it locally and have a poke around. To start off with, let’s pull the image so we can see how large it is;
docker pull portainer/portainerdocker imagesAs you can see from the terminal output above, the current version comes in at 9.132MB.
Now we have the image pulled; we can launch the container. As with any container which needs to access the Docker daemon on the host machine, we need to mount the socket file from the host within the container so to run Portainer we need to run the following command;
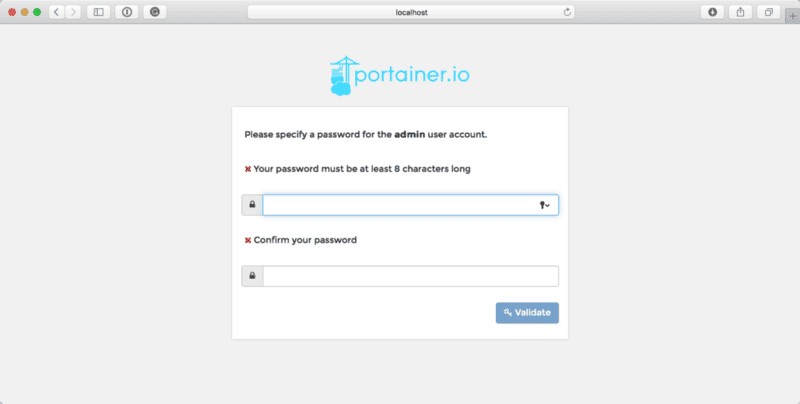
docker run -d -p 9000:9000 -v /var/run/docker.sock:/var/run/docker.sock portainer/portainerNow that Portainer is running you should be able to open your browser and enter http://localhost:9000/; you will be greeted by a screen which asks you to set a password for the admin user;
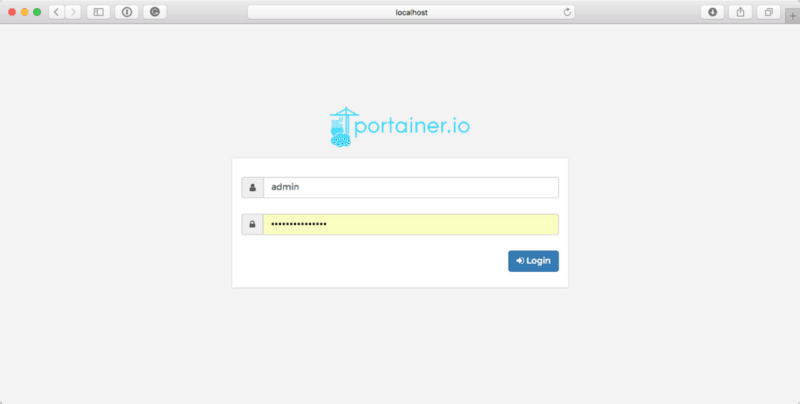
Setting the password and clicking on Validate will take you to a login page, once there enter the password you just set with the username of admin and the click on Login;
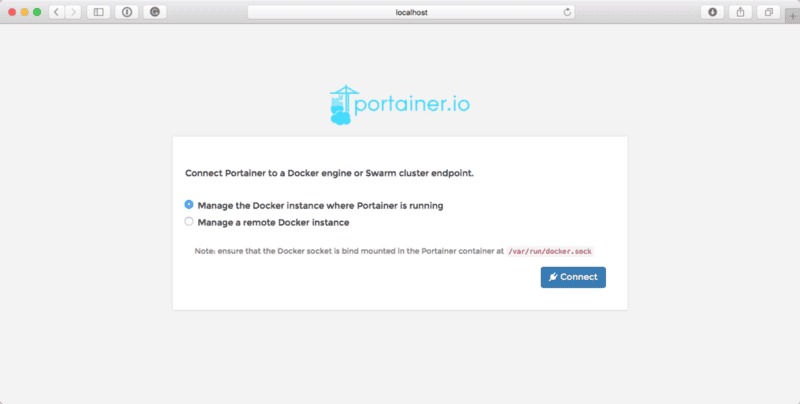
Once logged in you will be taken to the initial configuration page where you will be asked to choose between managing the Docker host where the Portainer is running a remote Docker host, for now, select the local Docker instance where Portainer is running and click on Connect;
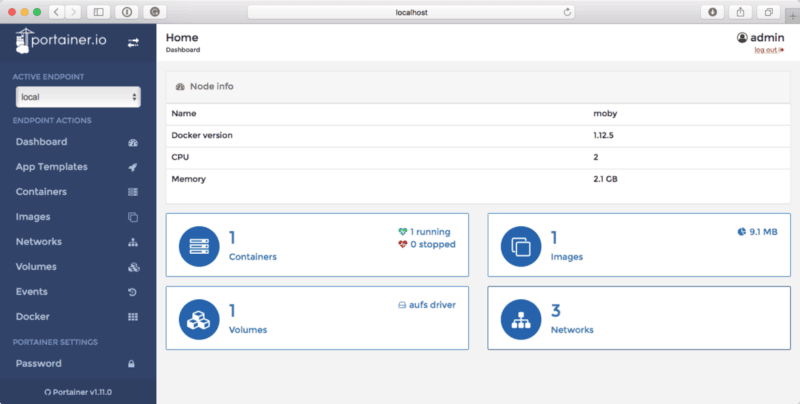
Once connected you will be presented with a Dashboard which looks something like the following;
The first impressions you get is that it seems to be quite intuitive, everything you should expect to see from a container manager appears to be present and readily available from the main page.
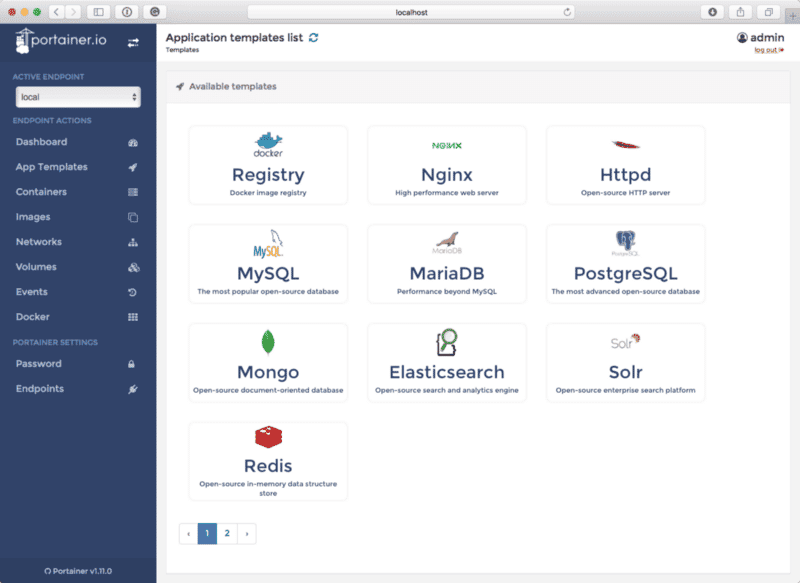
Let’s launch some containers, using a template. To do this click on App Templates;
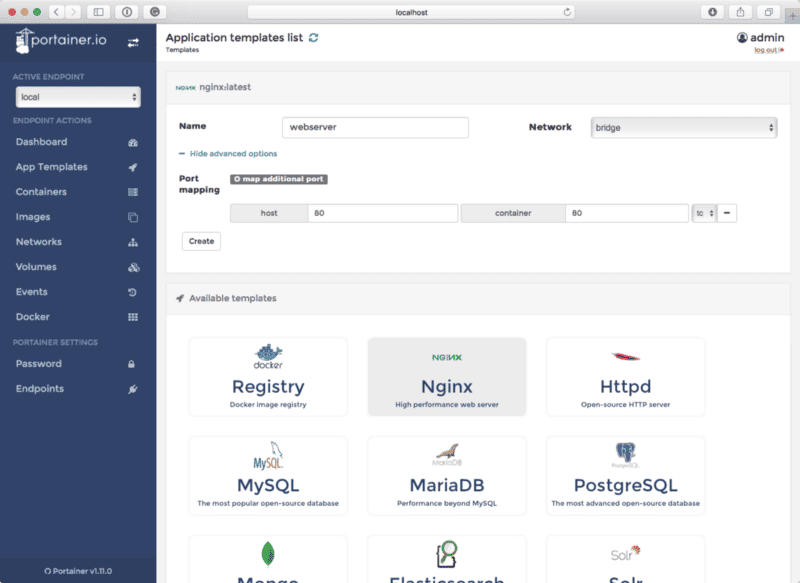
Then choose one of the templates presented, here I am going to launch a NGINX container, click on Show advanced options allows you to map the ports;
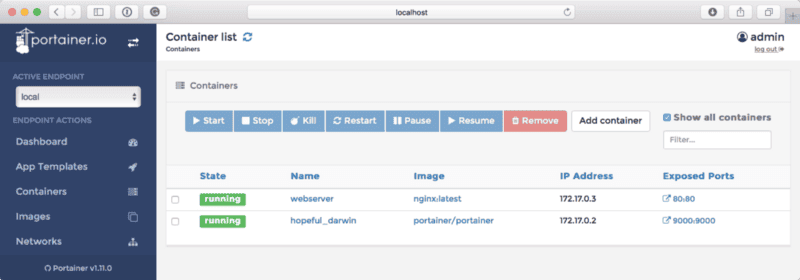
Once the container has launched you will be shown a list of your running containers;
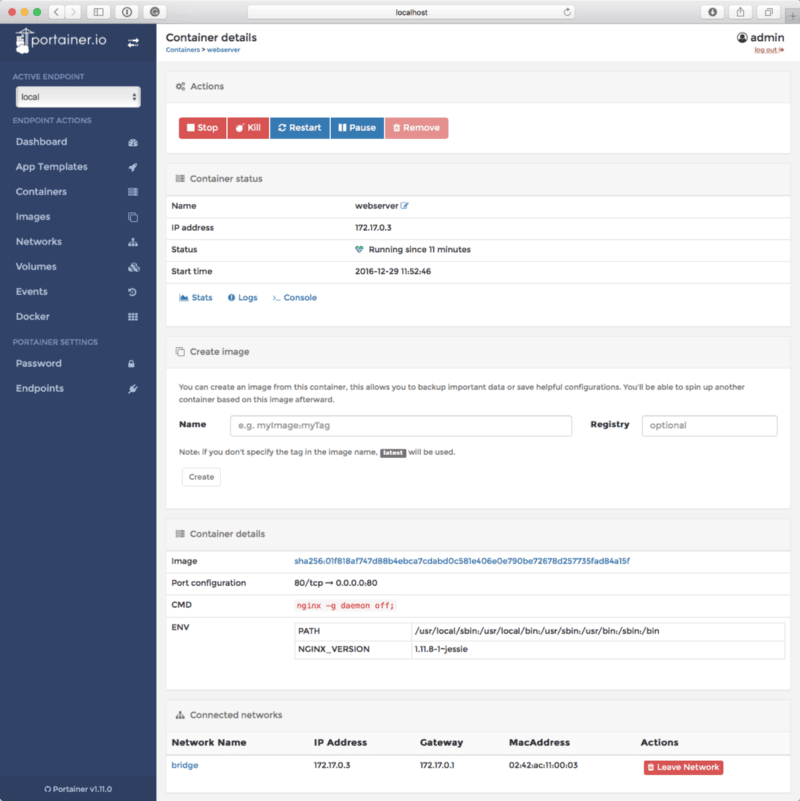
Clicking on the link in the Exposed Ports column will take you to that port, in a browser. Click on the name of the container will get a complete overview screen, from here you can see everything you would ever need to know about your newly launched container.
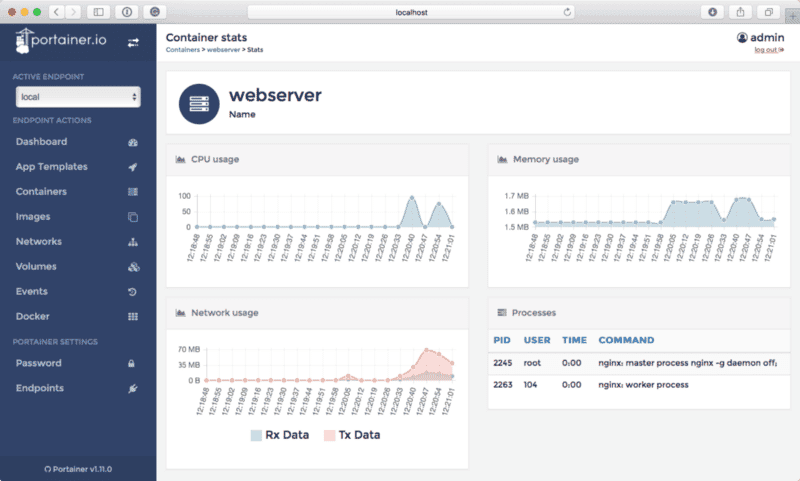
Clicking on Stats will show you a real-time breakdown of what is happening within your container;
As this is only using the output of the docker stats command data is not stored, refreshing the page restart the graphs.
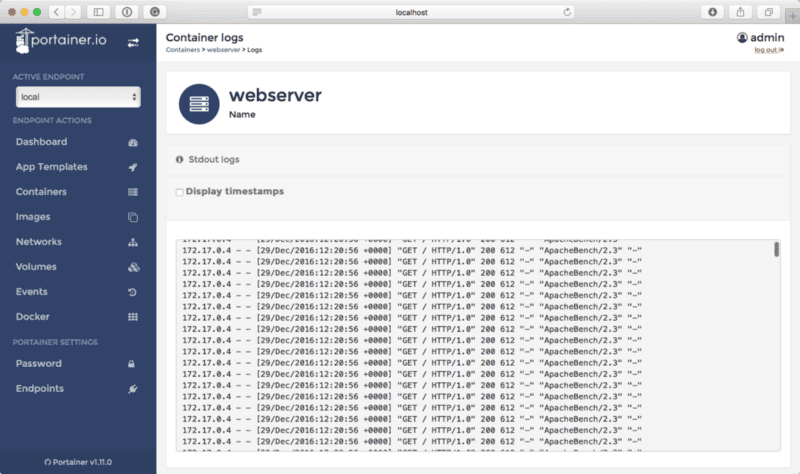
Clicking on Logs will render the output of docker logs;
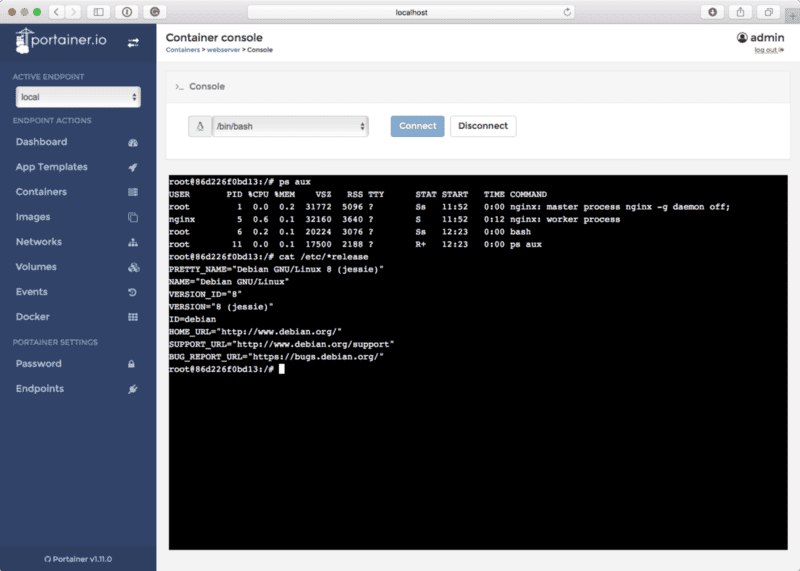
Finally, clicking on Console will open a terminal, first of all, you have to choose which command you would like to enter the terminal with, as you can see from the screen below I choose /bin/bash;
Running a container outside of Portainer will isn’t a problem, as we are hooked into the Docker daemon, it will show up within Portainer. For example, running Apache Bench against our NGINX container by running;
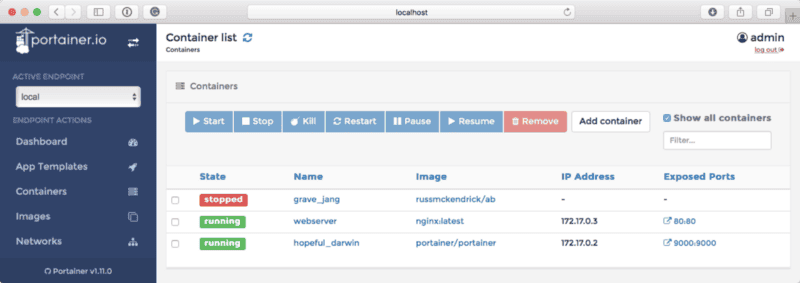
docker run --link=webserver russmckendrick/ab ab -k -n 100000 -c 30 http://webserver/Will show up as a stopped container in the list of containers;
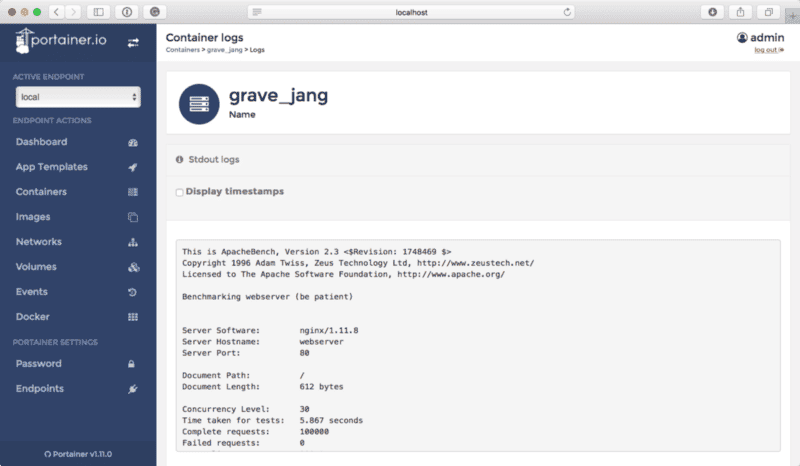
Clicking on its name and then logs will show you the results of the Apache Bench run;
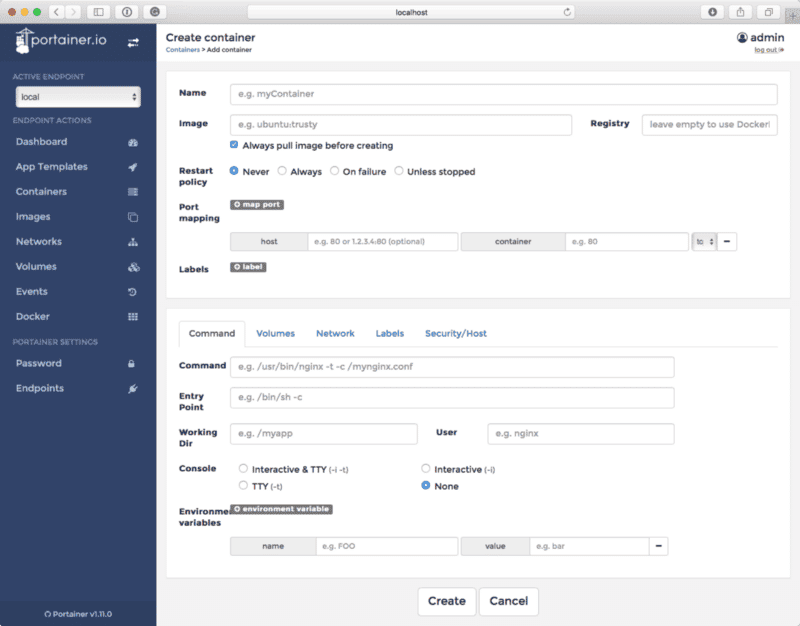
On thing you may have noticed when we created the NGINX container using the App Templates is that you didn’t get too much in the way of configurable options.
Portainer has you covered, going to Containers and then Add container exposes all of the options you are used to when launching containers from the command line;
There are also screens where you can;
- Pull and manage images
- Create, manage and inspect networks
- Create, manage and inspect volumes
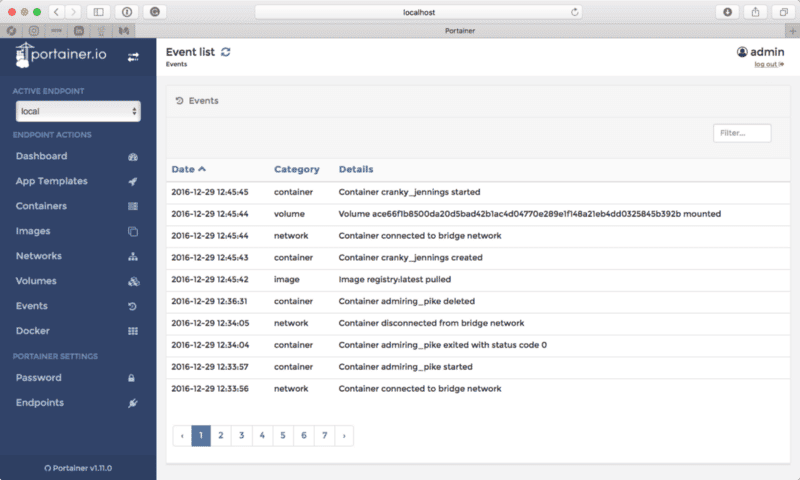
and finally you can get an audit trail of everything your Docker daemon has been up to by clicking on Events;
Docker Swarm Mode
Now let’s see what happens when we attach Portainer to a Docker Swarm cluster (running in Swarm mode and not the legacy standalone cluster).
First, we need to launch our Docker hosts; I ran the commands below to start a three node cluster in Digital Ocean using Docker Machine starting with the Swarm master;
docker-machine create \ --driver digitalocean \ --digitalocean-access-token your-do-token-goes-here \ --digitalocean-region lon1 \ --digitalocean-size 1gb \swmasterand then the two nodes;
docker-machine create \  --driver digitalocean \  --digitalocean-access-token your-do-token-goes-here \  --digitalocean-region lon1 \  --digitalocean-size 1gb \swnode01
docker-machine create \  --driver digitalocean \  --digitalocean-access-token your-do-token-goes-here \  --digitalocean-region lon1 \  --digitalocean-size 1gb \swnode02
Now that our three Docker hosts are online we can quickly configure Swarm by running the following commands. First, initialize cluster by running;
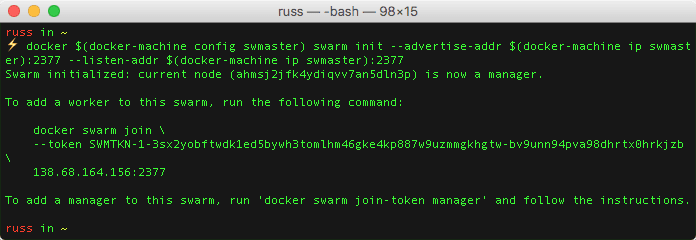
docker $(docker-machine config swmaster) swarm init --advertise-addr $(docker-machine ip swmaster):2377 --listen-addr $(docker-machine ip swmaster):2377Once the manager has been configured, you will be given a token;
Make a note of the token as you will need it to run the following commands which join the remaining two Docker hosts to our cluster;
docker $(docker-machine config swnode01) swarm join $(docker-machine ip swmaster):2377 --token SWMTKN-1-3sx2yobftwdk1ed5bywh3tomlhm46gke4kp887w9uzmmgkhgtw-bv9unn94pva98dhrtx0hrkjzb
docker $(docker-machine config swnode02) swarm join $(docker-machine ip swmaster):2377 --token SWMTKN-1-3sx2yobftwdk1ed5bywh3tomlhm46gke4kp887w9uzmmgkhgtw-bv9unn94pva98dhrtx0hrkjzb
You can check that all three hosts are part of the Swarm cluster by running;
docker $(docker-machine config swmaster) node lsNext, we need to connect our local Portainer installation to our Docker Swarm, to do this we will need the TLS certificates which Docker Machine created, to get these type the following command;
open ~/.docker/machine/certs/This will open a finder window with the certificates you will need to upload to Portainer;
Now that we have the certificates we need to the IP address of the Docker Swarm Manager, to get this run the following;
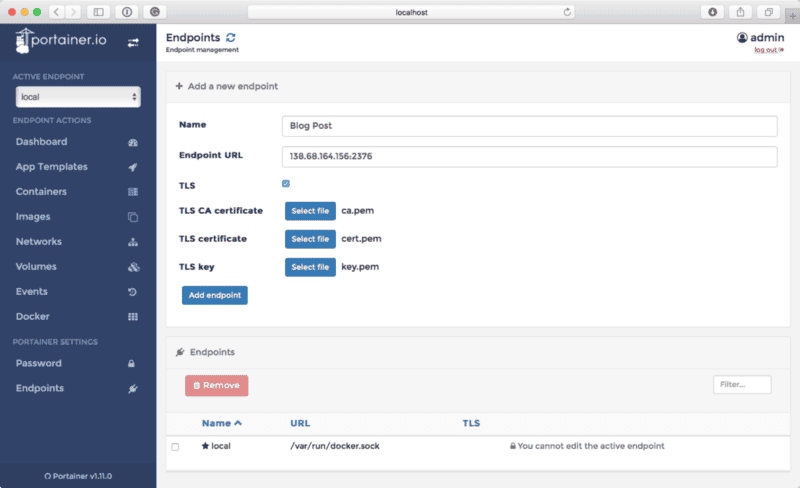
echo $(docker-machine ip swmaster)Return to your Portainer installation and click on Endpoints, click TLS and upload your certificates and give the endpoint details as per the screen below;
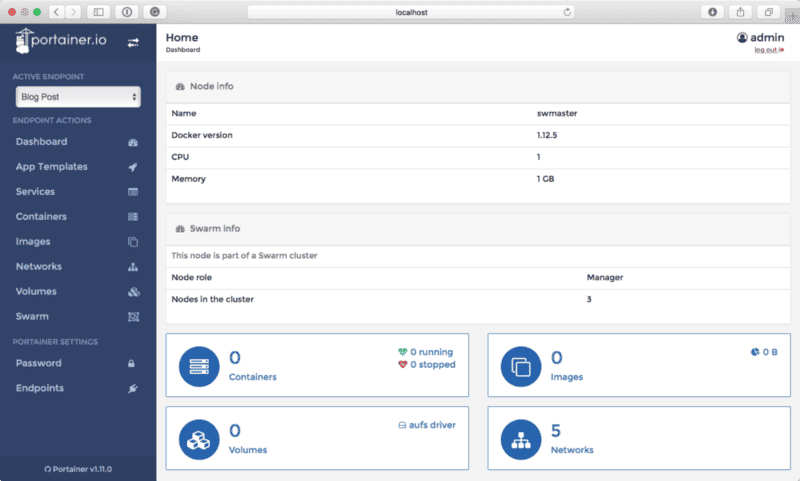
Once added you should see your newly added endpoint show up in the Active Endpoint dropdown list, select it and view will change;
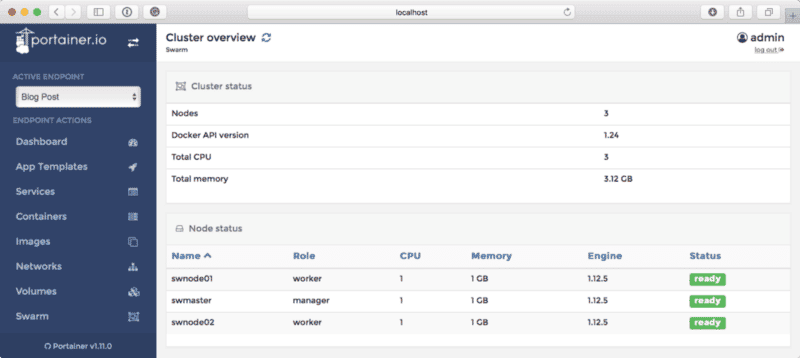
As you can see, we have a few additional options. You can view information on your cluster by clicking on Swarm;
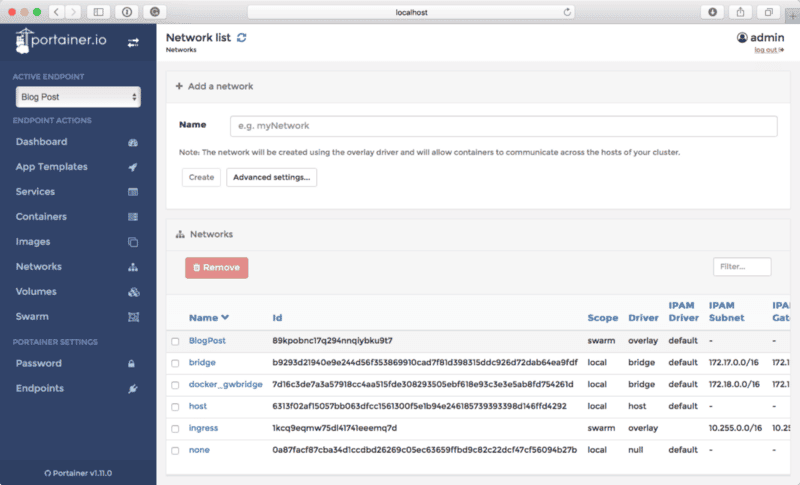
You can also add launch services by clicking Services. Before we launch a service we should create a network for our Service to launched into, click on Networks and then Create a network, I called mine “BlogPost”;
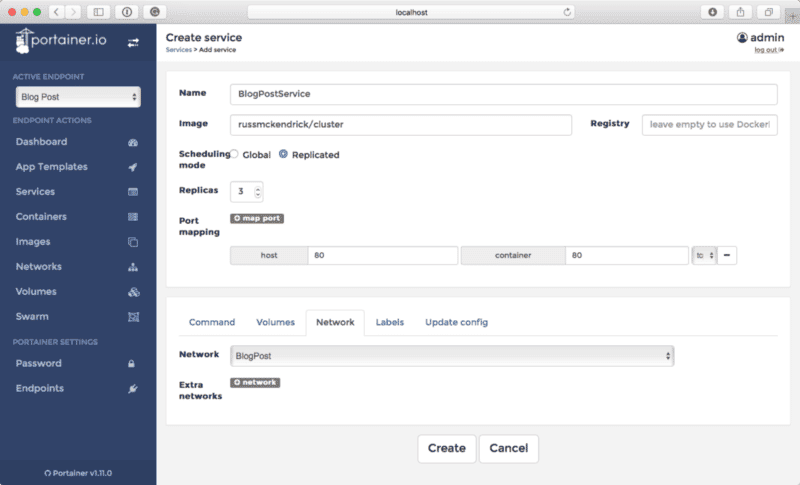
Now that we have our overlay network lets launch a service service by clicking on Services and then **Add service,**enter the following;
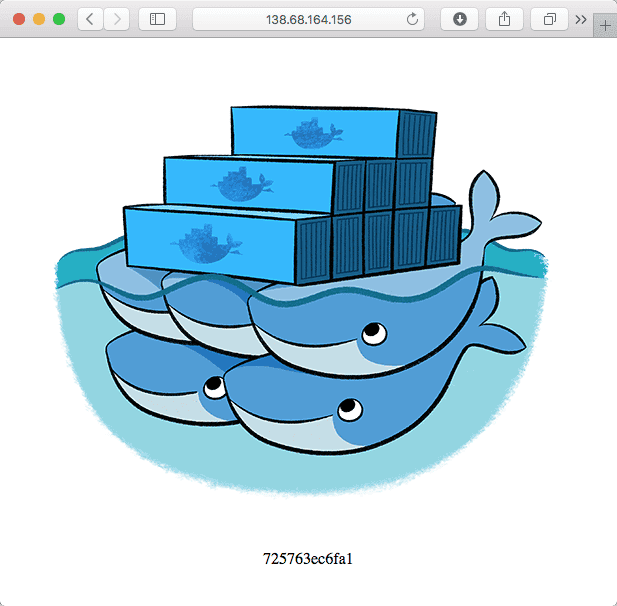
I am using an image called russmckendrick/cluster, all it does is display a Docker logo and the container ID. Also, make sure you select the network you created using the dropdown list on the Network tab.
Going to the IP address of any of the three Docker hosts in your Swarm cluster in a browser should present you with something which looks like the following page;
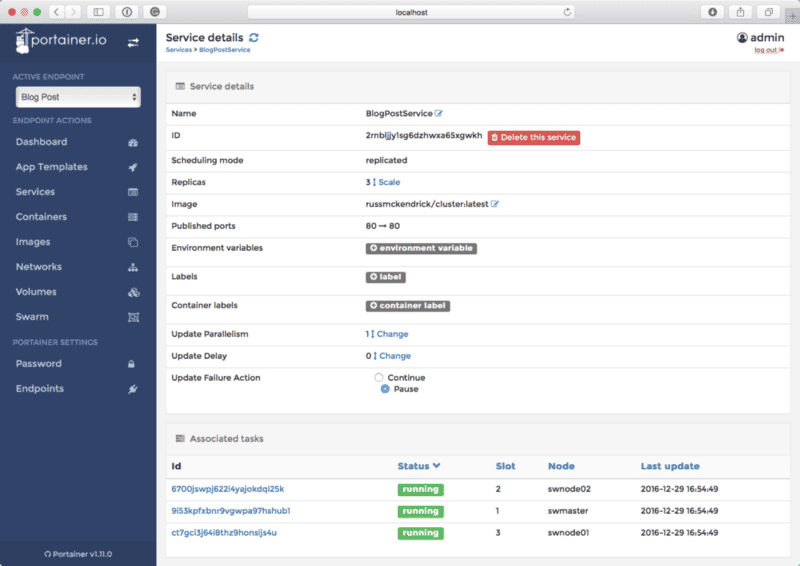
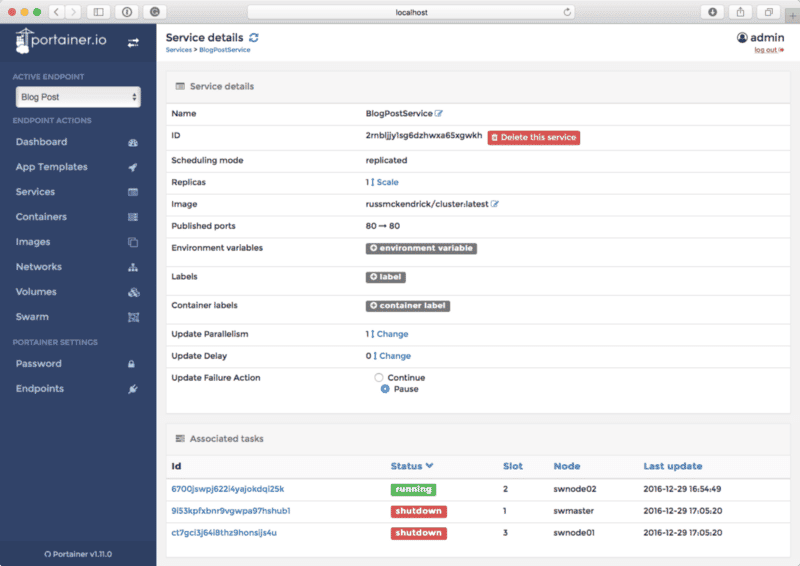
Clicking on the Name of your service will give you all of the information you would get from the command line along with options to scale, update and change the configuration of the service;
For example, you can reduce the number of conatiners within the service by clicking on Scale, reducing the number down to 1 and then clickSave changes;
Teardown
Don’t forget to remove your Docker Swarm nodes once you have finished playing, you can do this by running;
docker-machine rm swmaster swnode01 swnode02and also remove your Portainer installation by running;
docker stop name_of_your_portainer_conatinerdocker rm name_of_your_portainer_conatinerLimitations?
Portainer works exactly as avertised on their splash page;
It is probably the best UI to the Docker API I have used, and believe me; I have at one point or another used them all.
For managing multiple individual Docker hosts from a central location this probably the best tool out there at the moment. However, as it just talks to the Docker API you do have the same limitations a running Docker on the command line when it comes to a Docker Swarm cluster.
For example, you can only see containers running on your Swarm manager just like you would if you were running docker ps -a;
It would be nice to see all of the hosts which make up the Swarm cluster auto-discovered and added to a single view, however it makes sense as to why this feature isn’t already there, after all Portainer has not been designed to be a replacement for Docker Cloud or Rancher.
In all, well recommend if you need a UI to manage either your container hosts or a Docker Swarm cluster.
Further Reading
Here are some links you may find interesting …
- Portainer website http://www.portainer.io
- Portainer on Twitter https://twitter.com/portainerio
- Portainer on Slack http://www.portainer.io/slack
- Portainer on GitHub https://github.com/portainer
- Portainer Roadmap https://github.com/portainer/portainer/projects/2/
Also this post Neil Cresswellon Reddit has some background on why Portainer was written;
https://www.reddit.com/r/docker/comments/5ked5q/portainer_docker_incs_next_acquisition/dbpdmnu/?
Finally, there is also a good overview by The Containerizers;
Share
Related Posts

Trying out Elastic Beats
Explore Elastic Beats for data shipping in DevOps. Learn to set up and configure Metricbeat on Docker Swarm for system and Docker metrics analysis.

Tracking costs in Terraform using Infracost
Track Terraform costs with Infracost. Install, register, and monitor changes in your Azure DevOps pipeline efficiently.

Shopping for Containers
Explore the Docker Store, your one-stop marketplace for Docker-related content. From Docker EE to plugins and containers, find both free and paid offerings.
