OpenShift Origin V3
After being nagged by the gaffer to try OpenShift Origin V3 I finally got round to running a test server using Vagrant on my Mac.
I must say, going into this that the documentation at this stage is struggling a little to keep up with the development and these instructions are the results of much trial, error & Googling.
Also, the product is very much still in active development and there have been several bugs, like this one, which have caused the instructions below not to work.
First off, I am assuming you have Vagrant & VirtualBox installed (if not, go and install now).
I put my Vagrant machines in ~/Machines/ so first of lets create a directory in there so we can checkout the latest release and start the Vagrant machine;
mkdir -p ~/Machines/openshiftcd ~/Machines/openshiftgit clone — branch v0.5.2 https://github.com/openshift/origin.git .vagrant upvagrant sshand finally change to root to stop loads of permissions problems later on.
sudo su -You should be now SSH’ed into a Fedora 21 machine as root, before we start there is a little bit of house keeping we need to do to make sure you are starting from a clean slate. First off, lets install killall as you will need this later;
yum install -y psmiscThe Vagrantbox comes with some containers running, so lets clean up;
docker rm -f $(docker ps -a -q)Now check that everything is gone;
docker ps -aWhen the Vagrant machine booted it mounted a copy of the code you checked out into itself at /data/src/github.com/openshift/origin so lets change to that directory and install the client tools & server;
cd /data/src/github.com/openshift/originmake clean buildSo we now have a clean Fedora 21 machine running Docker with the latest release of OpenShift installed. Now its time to deploy actually run something, lets change to the “Sample App” directory and use it as the base for the remaining commands;
cd /data/src/github.com/openshift/origin/examples/sample-appThe first thing we need to do is pull down the latest version of the Docker images we are going to need to run the example app;
./pullimages.shNow we have the latests images lets start up the OpenShift server, load the certificate which was generated by the server starting and finally set some permissions on the config files;
/data/src/github.com/openshift/origin/_output/local/go/bin/openshift start — public-master=localhost &> logs/openshift.log & export CURL_CA_BUNDLE=pwd/openshift.local.config/master/ca.crt chmod a+rwX pwd/openshift.local.config/master/admin.kubeconfigNext up, lets start a Docker Registry;
chmod +r pwd/openshift.local.config/master/openshift-registry.kubeconfig openshift ex registry — create — credentials=`pwd`/openshift.local.config/master/openshift-registry.kubeconfig — config=`pwd`/openshift.local.config/master/admin.kubeconfigYou can check that the registry is running with the following command;
watch osc describe service docker-registry — config=openshift.local.config/master/admin.kubeconfigIt may take a few minutes to start, but when it has started you should see an Endpoint listed and not [none].
Once started you can add some permissions for the user test-admin;
osadm policy add-role-to-user view test-admin — config=openshift.local.config/master/admin.kubeconfigand finally login;
osc login — certificate-authority=openshift.local.config/master/ca.crtSelect the default URL and enter the username / password test-admin.
Now we can add the example app project;
osc new-project test — display-name=”OpenShift 3 Sample” — description=”This is an example project to demonstrate OpenShift v3"Import the project definition;
osc process -f application-template-stibuild.json | osc create -f -and finally build the application;
osc start-build ruby-sample-buildTo view the status of the builds you can run the following;
osc get builds — watchIf a build fails, you can just run the start-build command again. Once everything has been build you can view the status by running;
osc get podsThis will show you all of the running containers and is similar to the output you see when running docker -ps. You can also run;
osc get servicesWhen running the last command make a note of the IP address and port of the front-end.
To view the application exit out of the Vagrant box and then log back in using the following (replacing the IP address of that of the front-end from the osc get services);
vagrant ssh — -L 9999:172.30.69.234:5432Now goto http://localhost:9999 and you should see the application.
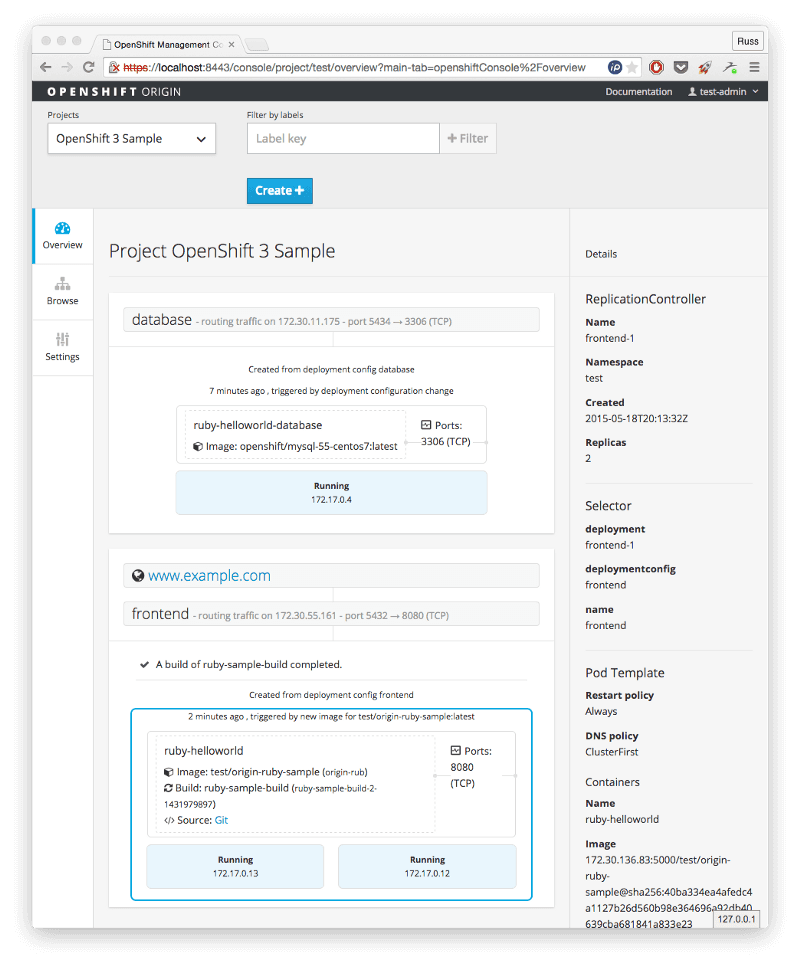
Also, don’t forget there is a web interface available at https://localhost:8443/console/ login using the test-admin username you created earlier.
Finally, when you have finished don’t forget to teardown the application and destroy the sample application (it will leave traces in your working directory) by running the clean up script;
cd /data/src/github.com/openshift/origin/examples/sample-app ./cleanup.sh exit exit vagrant destroyAnd thats it, you have installed OpenShift 3 and launched a sample application. Its going to be an interesting few months as OpenShift 3 gets closer to release.
Share
Related Posts

Flocker on CentOS 7
Russ Mckendrick explores Flocker on CentOS 7, enhancing Dockerized applications with robust persistent storage solutions.

Update to CentOS 7 Docker install one-liner
Discover the updated one-liner Docker installer for CentOS 7. Install Docker 1.7 and docker-compose effortlessly with the official RPM and a single command.

Upgrading my servers to CentOS 7
Learn about the process of upgrading servers from CentOS 6 to CentOS 7, including updates for Puppet Master server, Apache configuration, and Docker server.
